Nexus Artifact Repository Management
Overview

Nexus Repository is a powerful artifact repository manager that supports multiple package formats. This guide covers production-ready setup with PostgreSQL, security configurations, and practical examples for creating custom repositories.
Prerequisites
- Docker and Docker Compose
- PostgreSQL knowledge
- AWS account (for S3 blob store)
- Basic understanding of package management
Quick Start
PostgreSQL Database Setup
- Nexus Repository™ defaults to an embedded H2 database, which is not recommended for production. This guide shows you how to configure Nexus with an external PostgreSQL database for better reliability and scalability.
➡️ System Requirements for PostgreSQL
These instructions are to start Nexus Repository using an external PostgreSQL database. Download and configure Nexus Repository as per documentation, but hold off on starting the instance until PostgreSQL is ready and properly configured.
- See Install
NexusRepository - Create a
PostgreSQLdatabase. - Set the database configuration.
- Start the Nexus Repository instance.
Following are basic steps for setting up a PostgreSQL Database. See the PostgreSQL documentation https://www.postgresql.org/docs/current/multibyte.html#id-1.6.11.5.6
-
Connect to your
PostgreSQLserver as a superuser. This is typicallypostgres:psql -U postgres -
Create a new database for Nexus Repository:
CREATE DATABASE nexus ENCODING 'UTF8' LC_COLLATE = 'en_US.UTF-8' LC_CTYPE = 'en_US.UTF-8' TEMPLATE template0; -
Connect to the newly created database:
\c nexus; -
Create a schema (optional, but recommended):
CREATE SCHEMA nexus; -
Create a user for Nexus Repository:
CREATE USER nexus WITH PASSWORD 'somepassword'; -
Grant necessary privileges to the user:
GRANT ALL PRIVILEGES ON DATABASE nexus TO nexus;
GRANT ALL PRIVILEGES ON SCHEMA nexus TO nexus; -
Install the required trigram module. Note that this example command assumes you have created a schema named nexus. If you have not, you can use public:
CREATE EXTENSION pg_trgm SCHEMA nexus;
Database Configuration
Nexus Repository supports 3 methods for providing the database configuration settings. When Nexus Repository initially starts, the first connection method encountered is used while the other methods are ignored. Mixing methods are not supported.
The settings are checked in the following order:
- (1) Environment Variables
- (2) JVM Arguments
- (3) the Properties File
In this example, we will use the Environment Variables File method.
Environment Variables
Pass the connectivity details as environment variables:
NEXUS_DATASTORE_NEXUS_JDBCURL
NEXUS_DATASTORE_NEXUS_USERNAME
NEXUS_DATASTORE_NEXUS_PASSWORD
Default Nexus login credentials are:
Username: admin
Password: admin123
Docker Compose Configuration
services:
  postgres:
    image: postgres:15-alpine
    container_name: nexus-postgres
    environment:
      POSTGRES_DB: nexus
      POSTGRES_USER: nexus
      POSTGRES_PASSWORD: your_secure_password_here
    command: postgres -c max_connections=200 -c shared_buffers=256MB
    volumes:
      - postgres_data:/var/lib/postgresql/data
    ports:
      - "5432:5432"
    restart: unless-stopped
    healthcheck:
      test: ["CMD-SHELL", "pg_isready -U nexus"]
      interval: 10s
      timeout: 5s
      retries: 5

  nexus:
    image: sonatype/nexus3:3.82.0
    container_name: nexus
    depends_on:
      postgres:
        condition: service_healthy
    ports:
      - "8081:8081"
    volumes:
      - nexus_data:/nexus-data
      - "./nexus.secrets.json:/opt/sonatype/nexus/etc/nexus.secrets.json"
    environment:
      - NEXUS_SECURITY_RANDOMPASSWORD=false
      - INSTALL4J_ADD_VM_PARAMS=-Xms2g -Xmx2g -XX:MaxDirectMemorySize=3g
      - NEXUS_DATASTORE_NEXUS_JDBCURL=jdbc:postgresql://postgres:5432/nexus
      - NEXUS_DATASTORE_NEXUS_USERNAME=nexus
      - NEXUS_DATASTORE_NEXUS_PASSWORD=your_secure_password_here
      - NEXUS_SECRETS_KEY_FILE=/opt/sonatype/nexus/etc/nexus.secrets.json
    restart: unless-stopped

volumes:
  postgres_data:
  nexus_data:
Security Configuration
Change Default Admin Credentials
Critical: Default credentials (admin/admin123) must be changed immediately after first login.
Immediately change the default admin credentials after first login to prevent unauthorized access.
-
Open the Nexus website, navigate to
Account>My Account.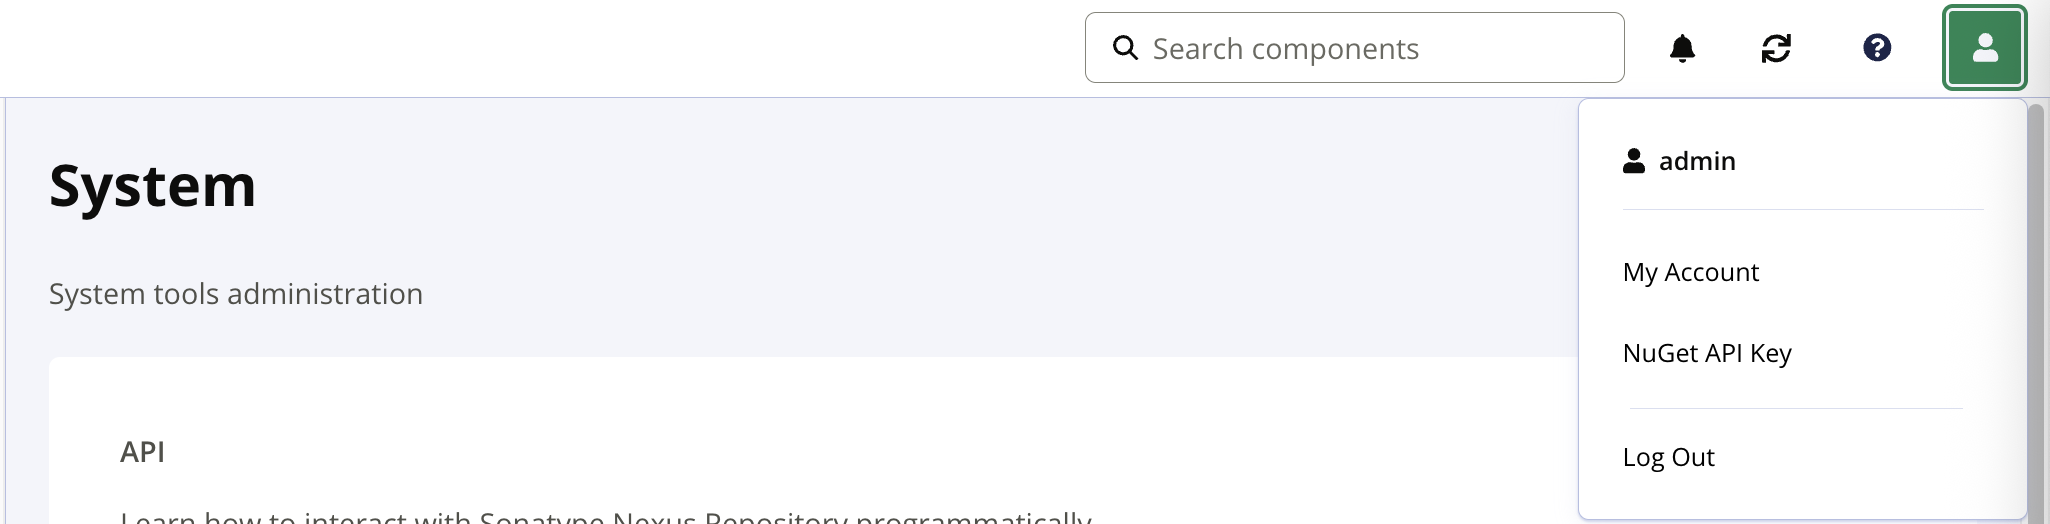
-
Click on
Change Passwordand set a new password.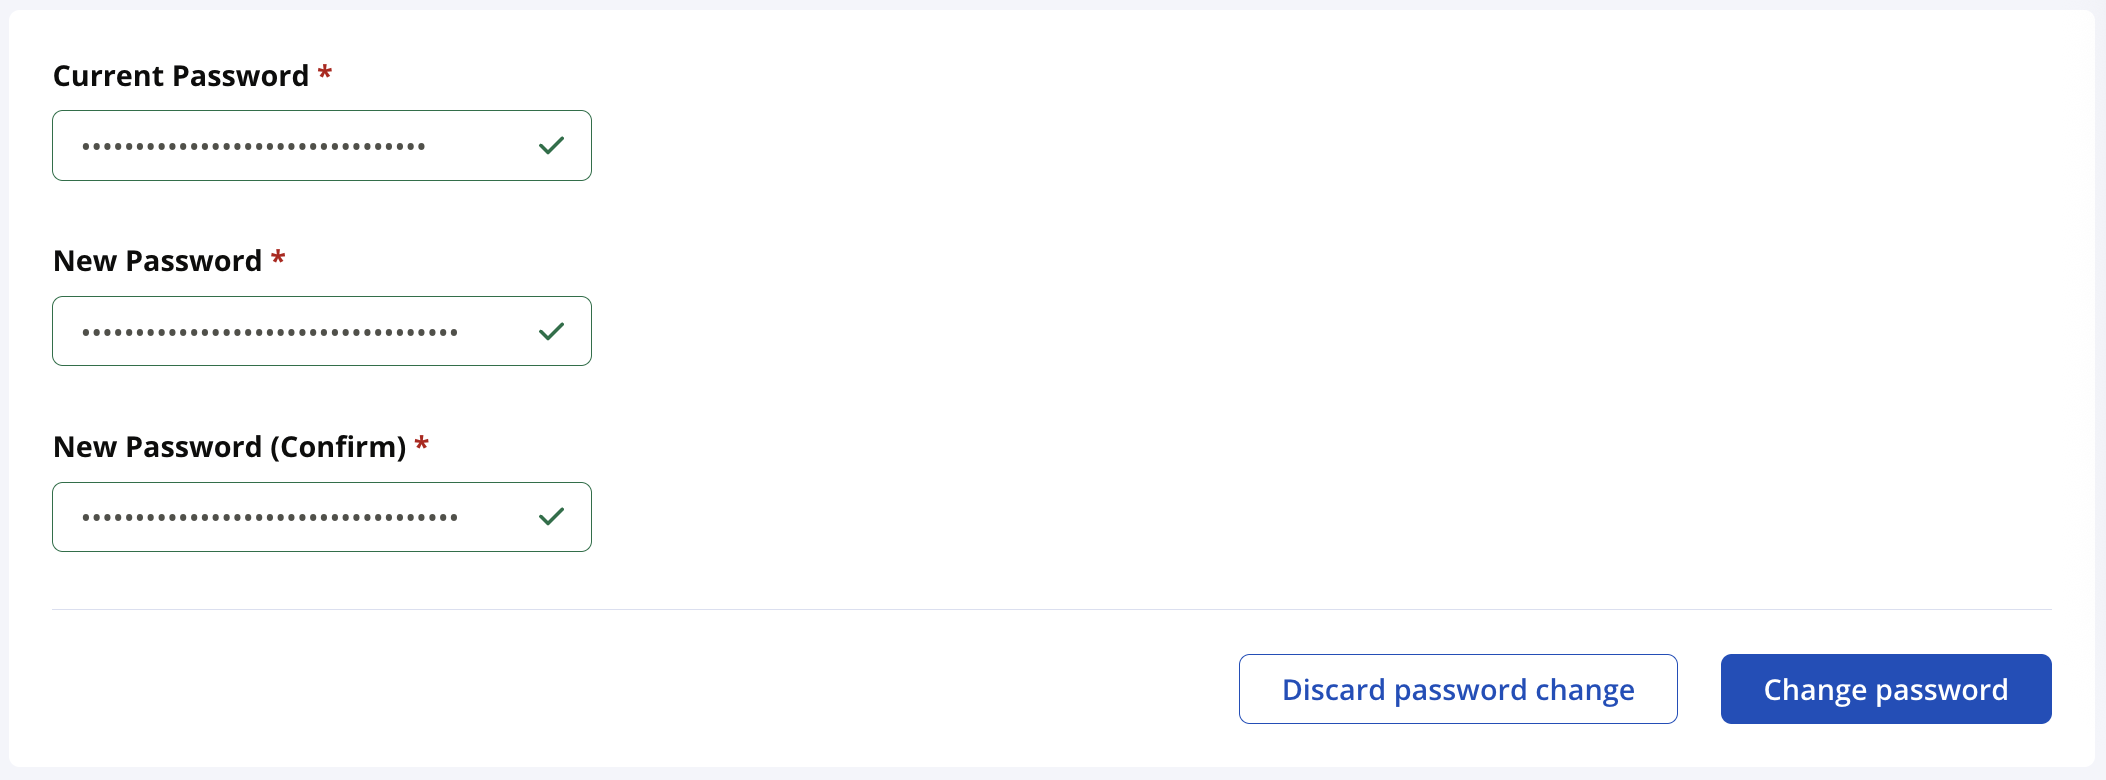
Default Secret Encryption Key
Generate key and json file
-
Generate the key using the following command:
openssl rand -base64 32 -
Use the following template to create the nexus.secrets.json file. Replace
new-key-generated-from-openssl-commandwith the key generated above and set a name for active and id:- Filename:
nexus.secrets.json{
"active": "b_nexuskey", // Set a name for the active key, any name can be used
"keys": [
{
"id": "b_nexuskey",
"key": "new-key-generated-from-openssl-command"
}
]
} - Restart the Nexus container for the secret configuration to be applied.
- Filename:
-
Update
docker-compose.yml- Add the JSON file to the volumes section of
docker-compose.ymlfile and configure the environment variable for its file path:...
nexus:
image: sonatype/nexus3:3.82.0
container_name: nexus
depends_on:
- postgres
ports:
- "8081:8081"
volumes:
- nexus_data:/nexus-data
- "./nexus.secrets.json:/opt/sonatype/nexus/etc/nexus.secrets.json"
environment:
- NEXUS_SECURITY_RANDOMPASSWORD=false
...
- Add the JSON file to the volumes section of
-
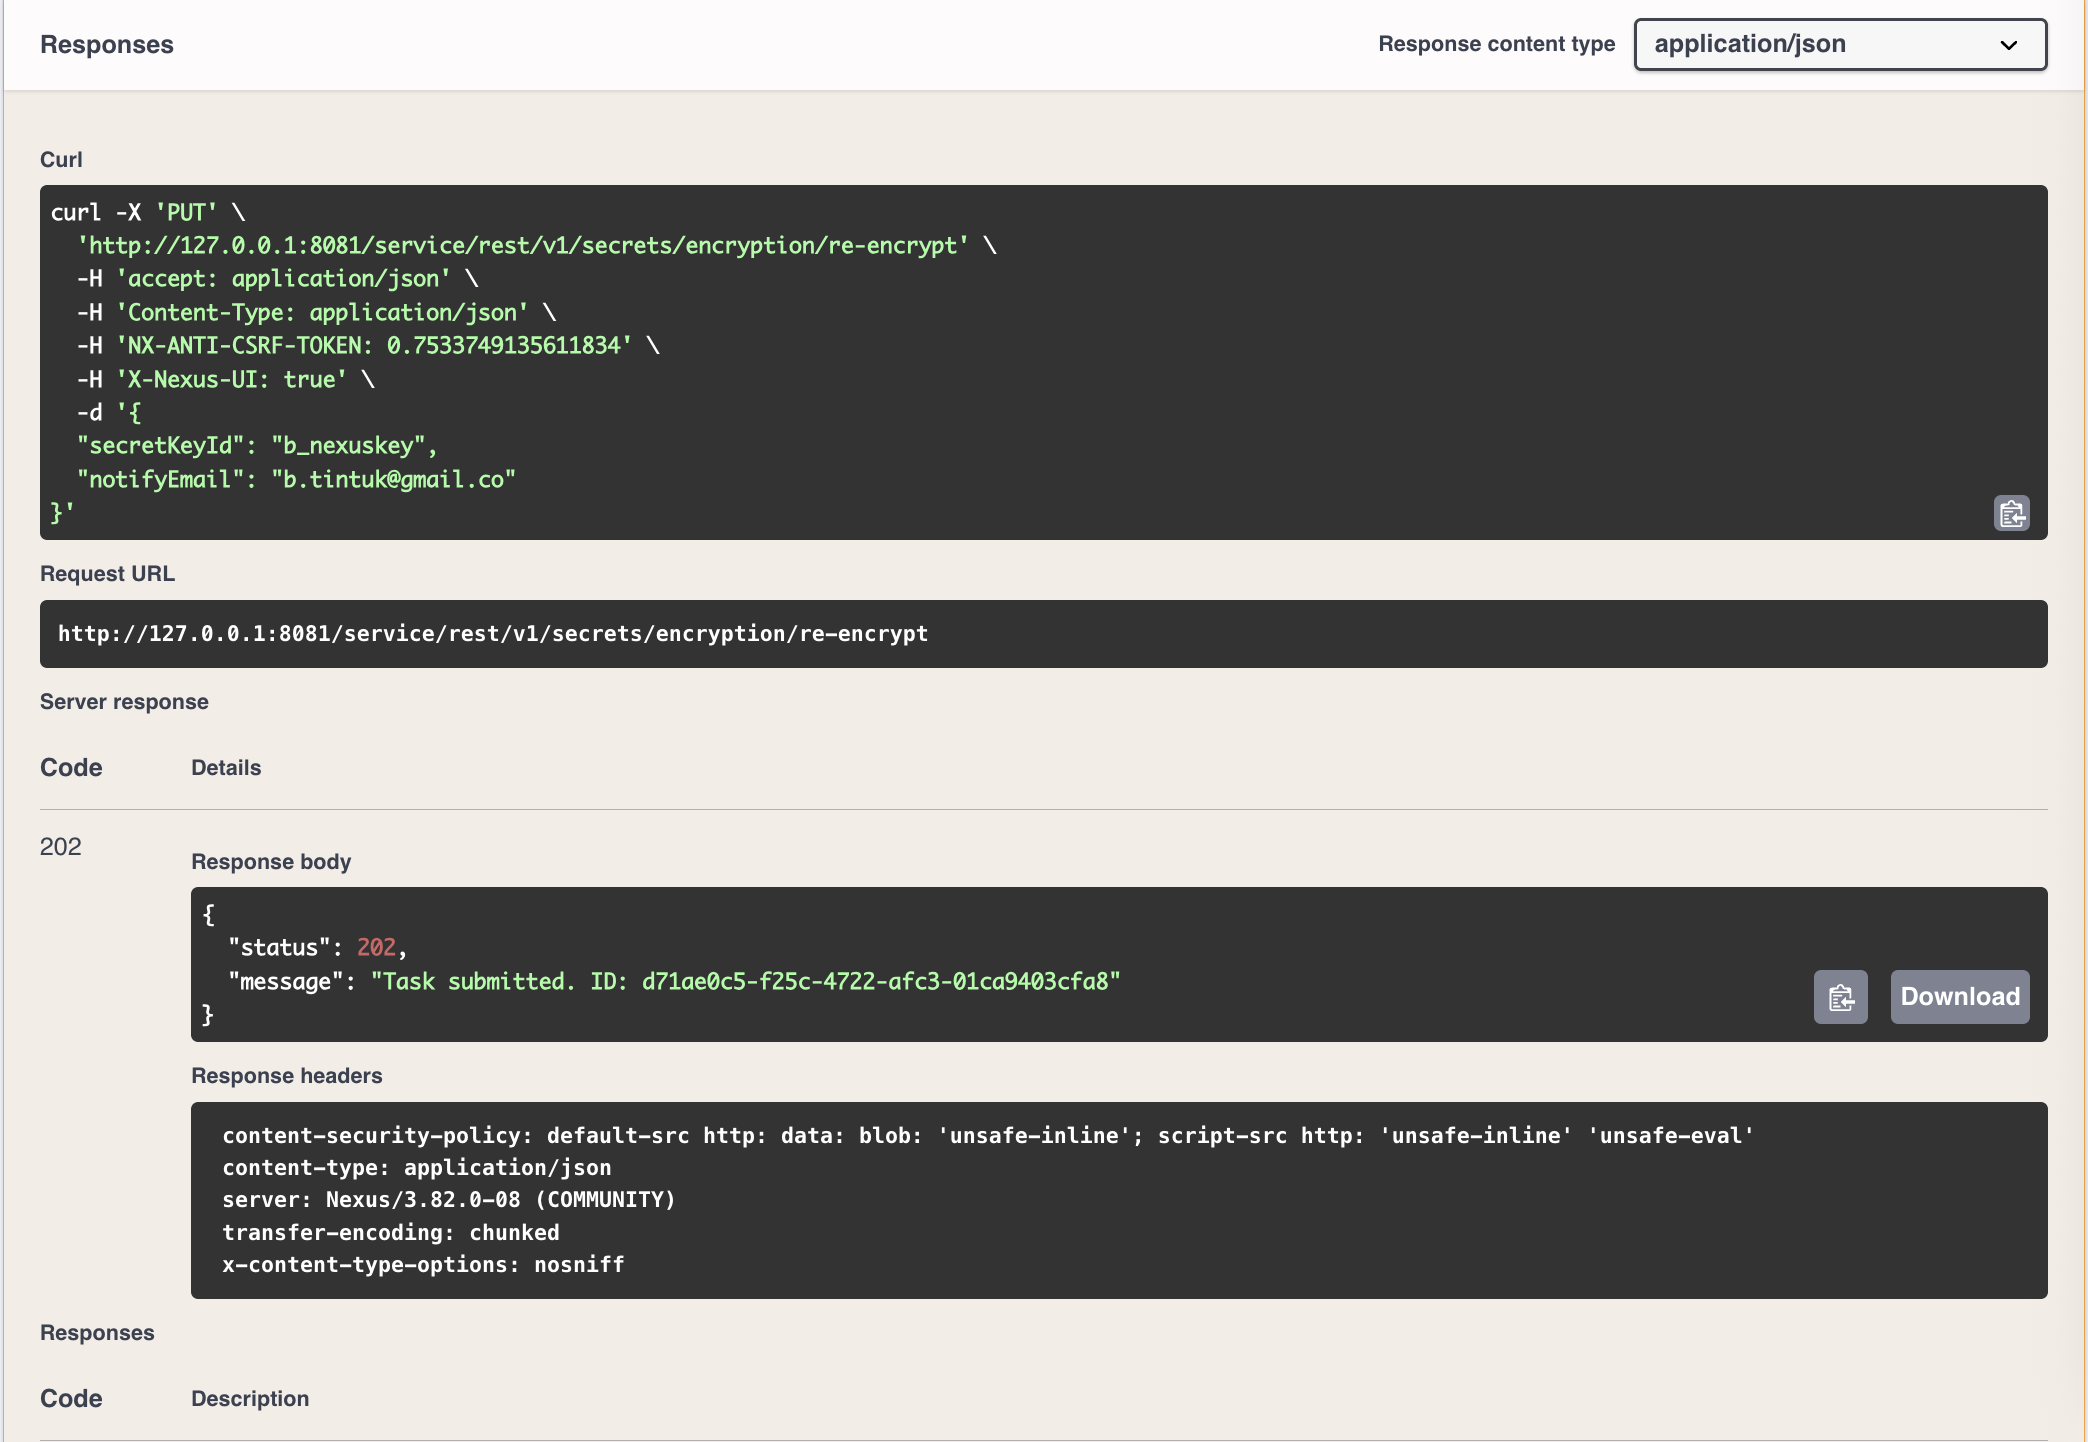
Re-encrypt via the API
-
Open the Nexus website, navigate to
Admin>System>API.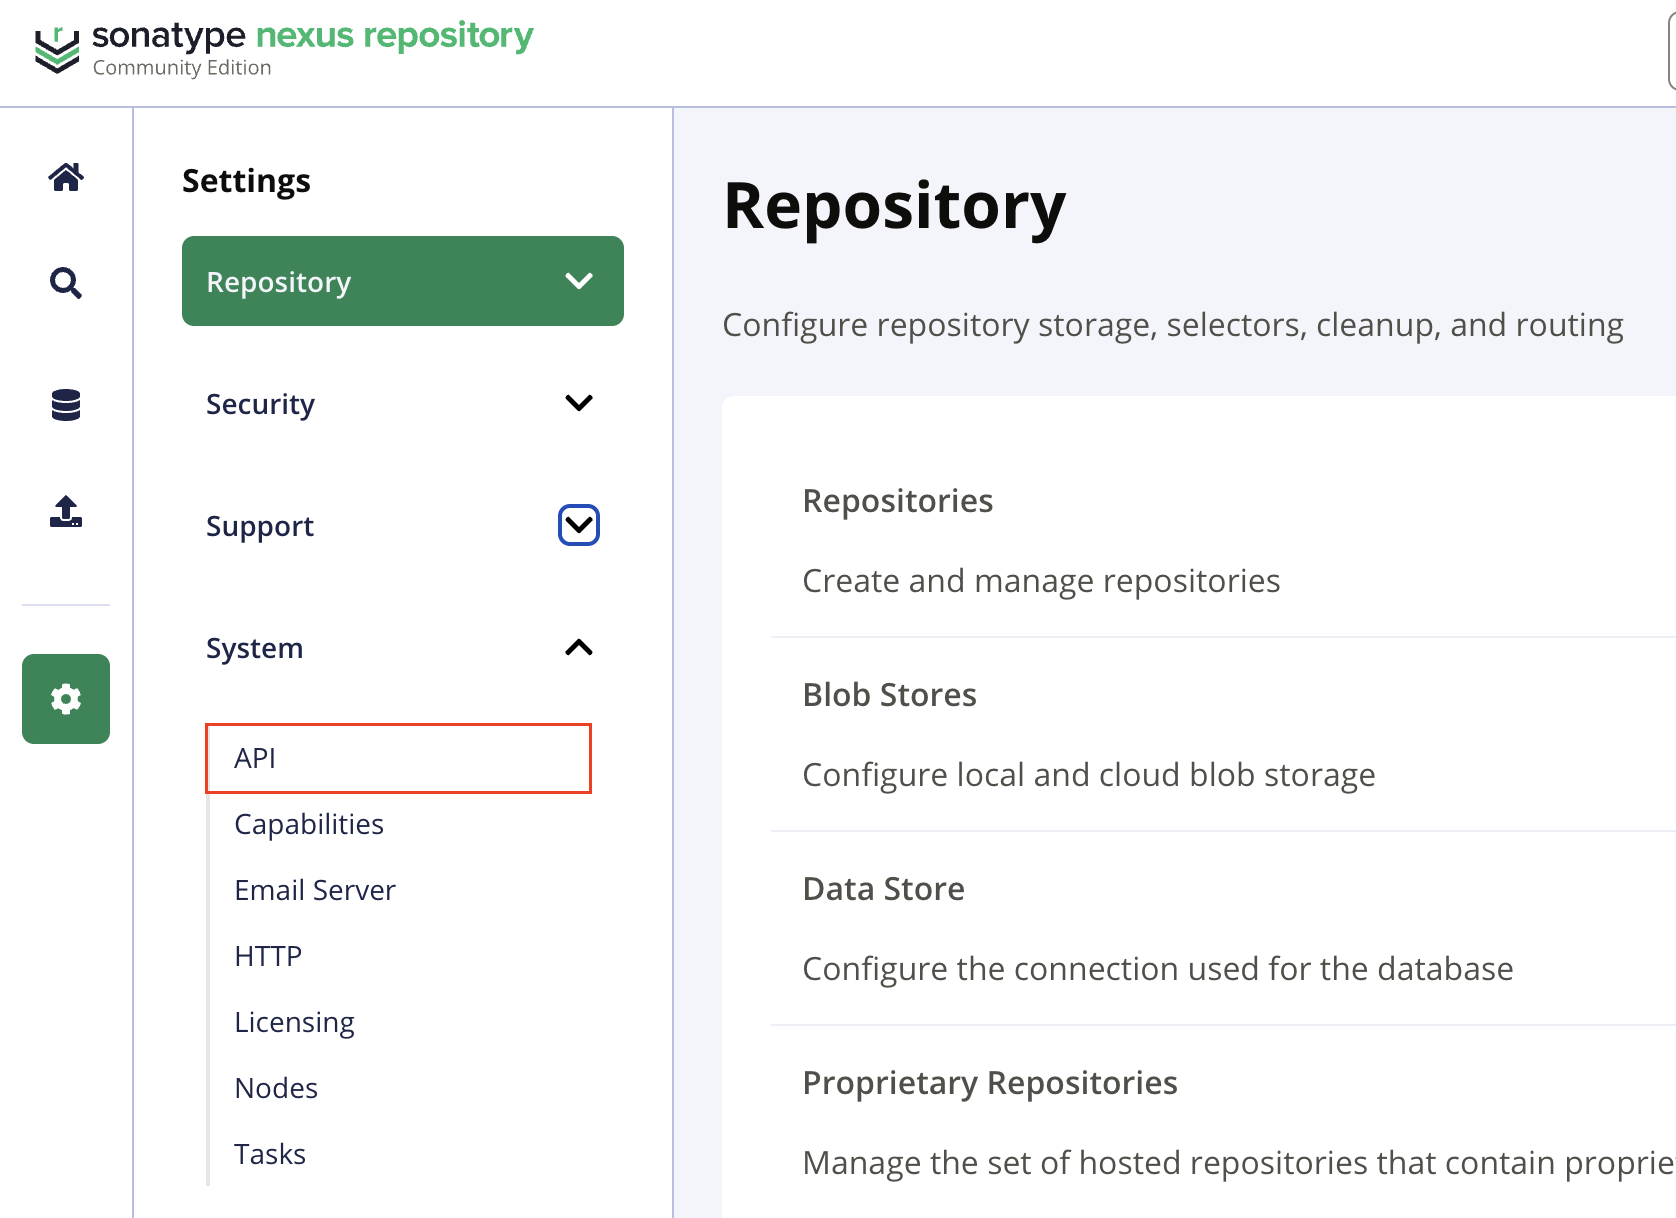
-
Search for the API endpoint
Security Management: Secrets Encryption.
-
Click and expand
Put /v1/secrets/encryption/re-encryptand clicktry outand replace the secretKeyId string with the id of the new key you added in the previous step (e.g.,b_nexuskeyand add a notification email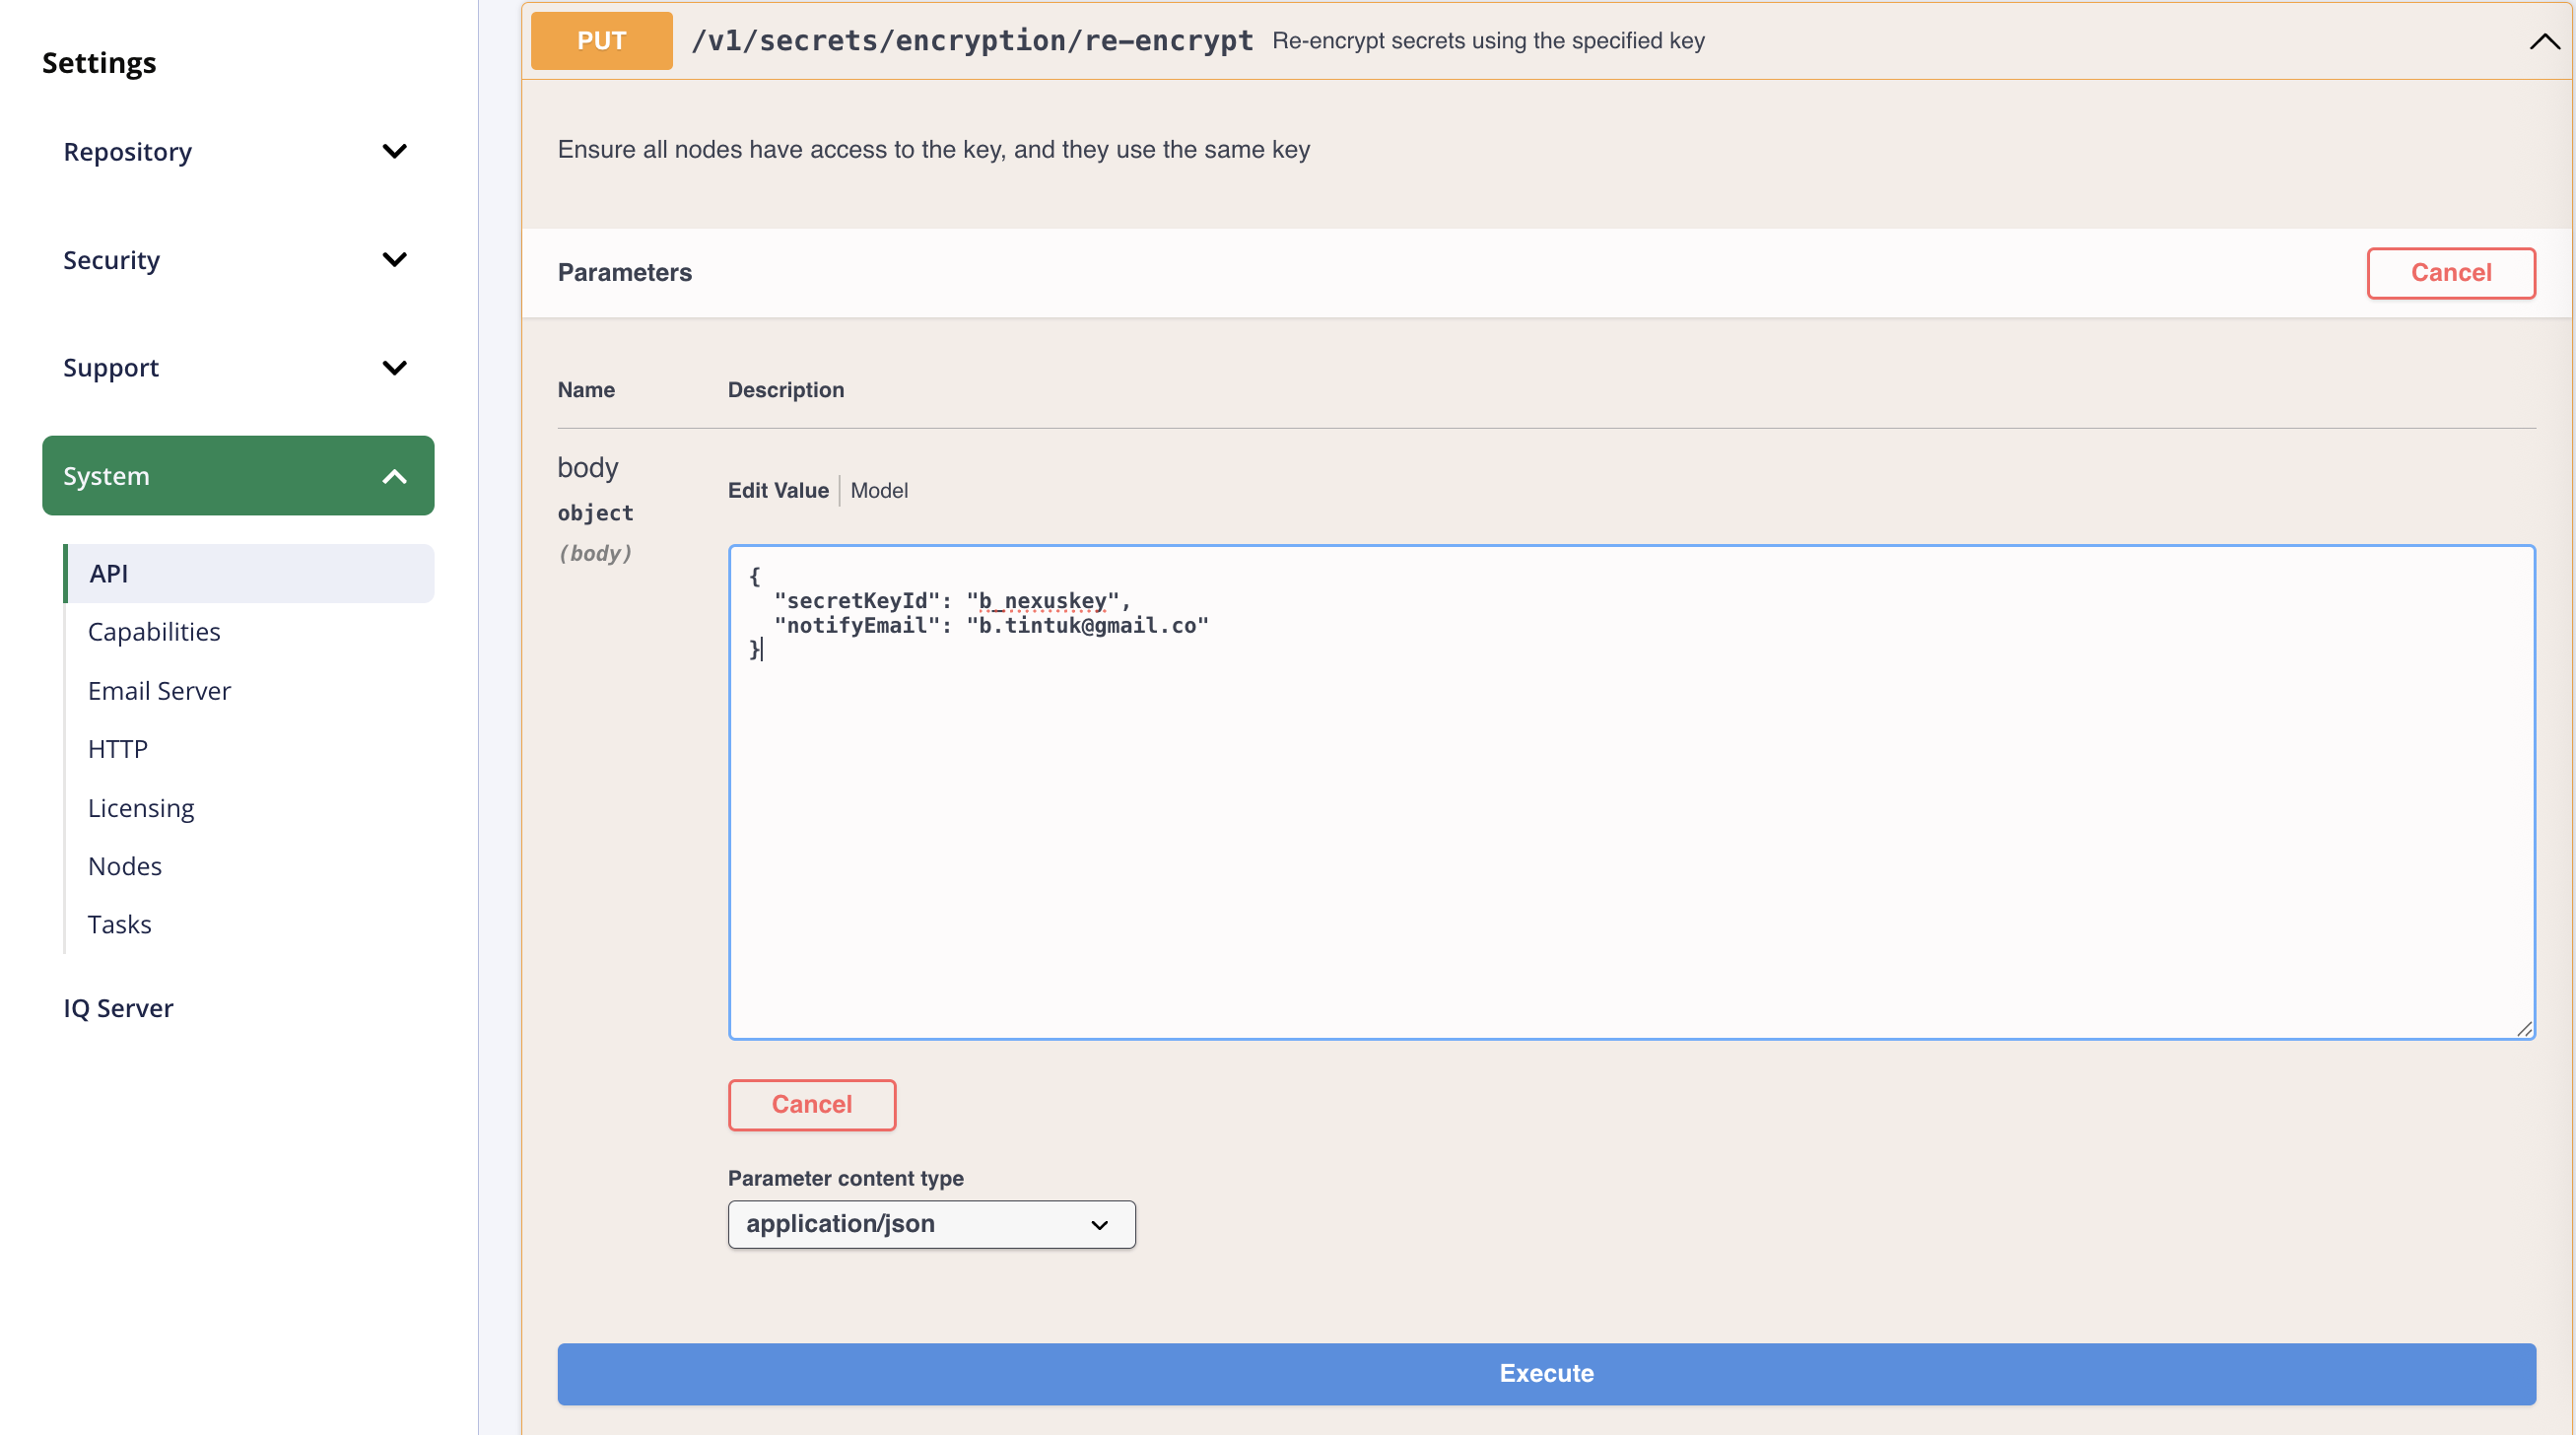
-
Blob Store Configuration
What is a Blog Store?
The binary assets you download via proxy repositories, or publish to hosted repositories, are stored in the blob store attached to those repositories. In traditional, single node NXRM deployments, blob stores are typically associated with a local filesystem directory, usually within the sonatype-work directory. For more information, check the documentation.
Nexus Repository supports several types of blob stores. In general, file system blob stores have better performance, but object store blob stores offer unbounded storage and convenience. Cloud object stores should only be used when running Nexus Repository on the cloud provider in the same region.
- File Blob Store https://help.sonatype.com/en/storage-planning.html#file-blob-store
- Object Blob Stores https://help.sonatype.com/en/storage-planning.html#object-blob-stores
In this example, we will use the Object Blob Store with Amazon S3.
Create Blob Store With Amazon S3
-
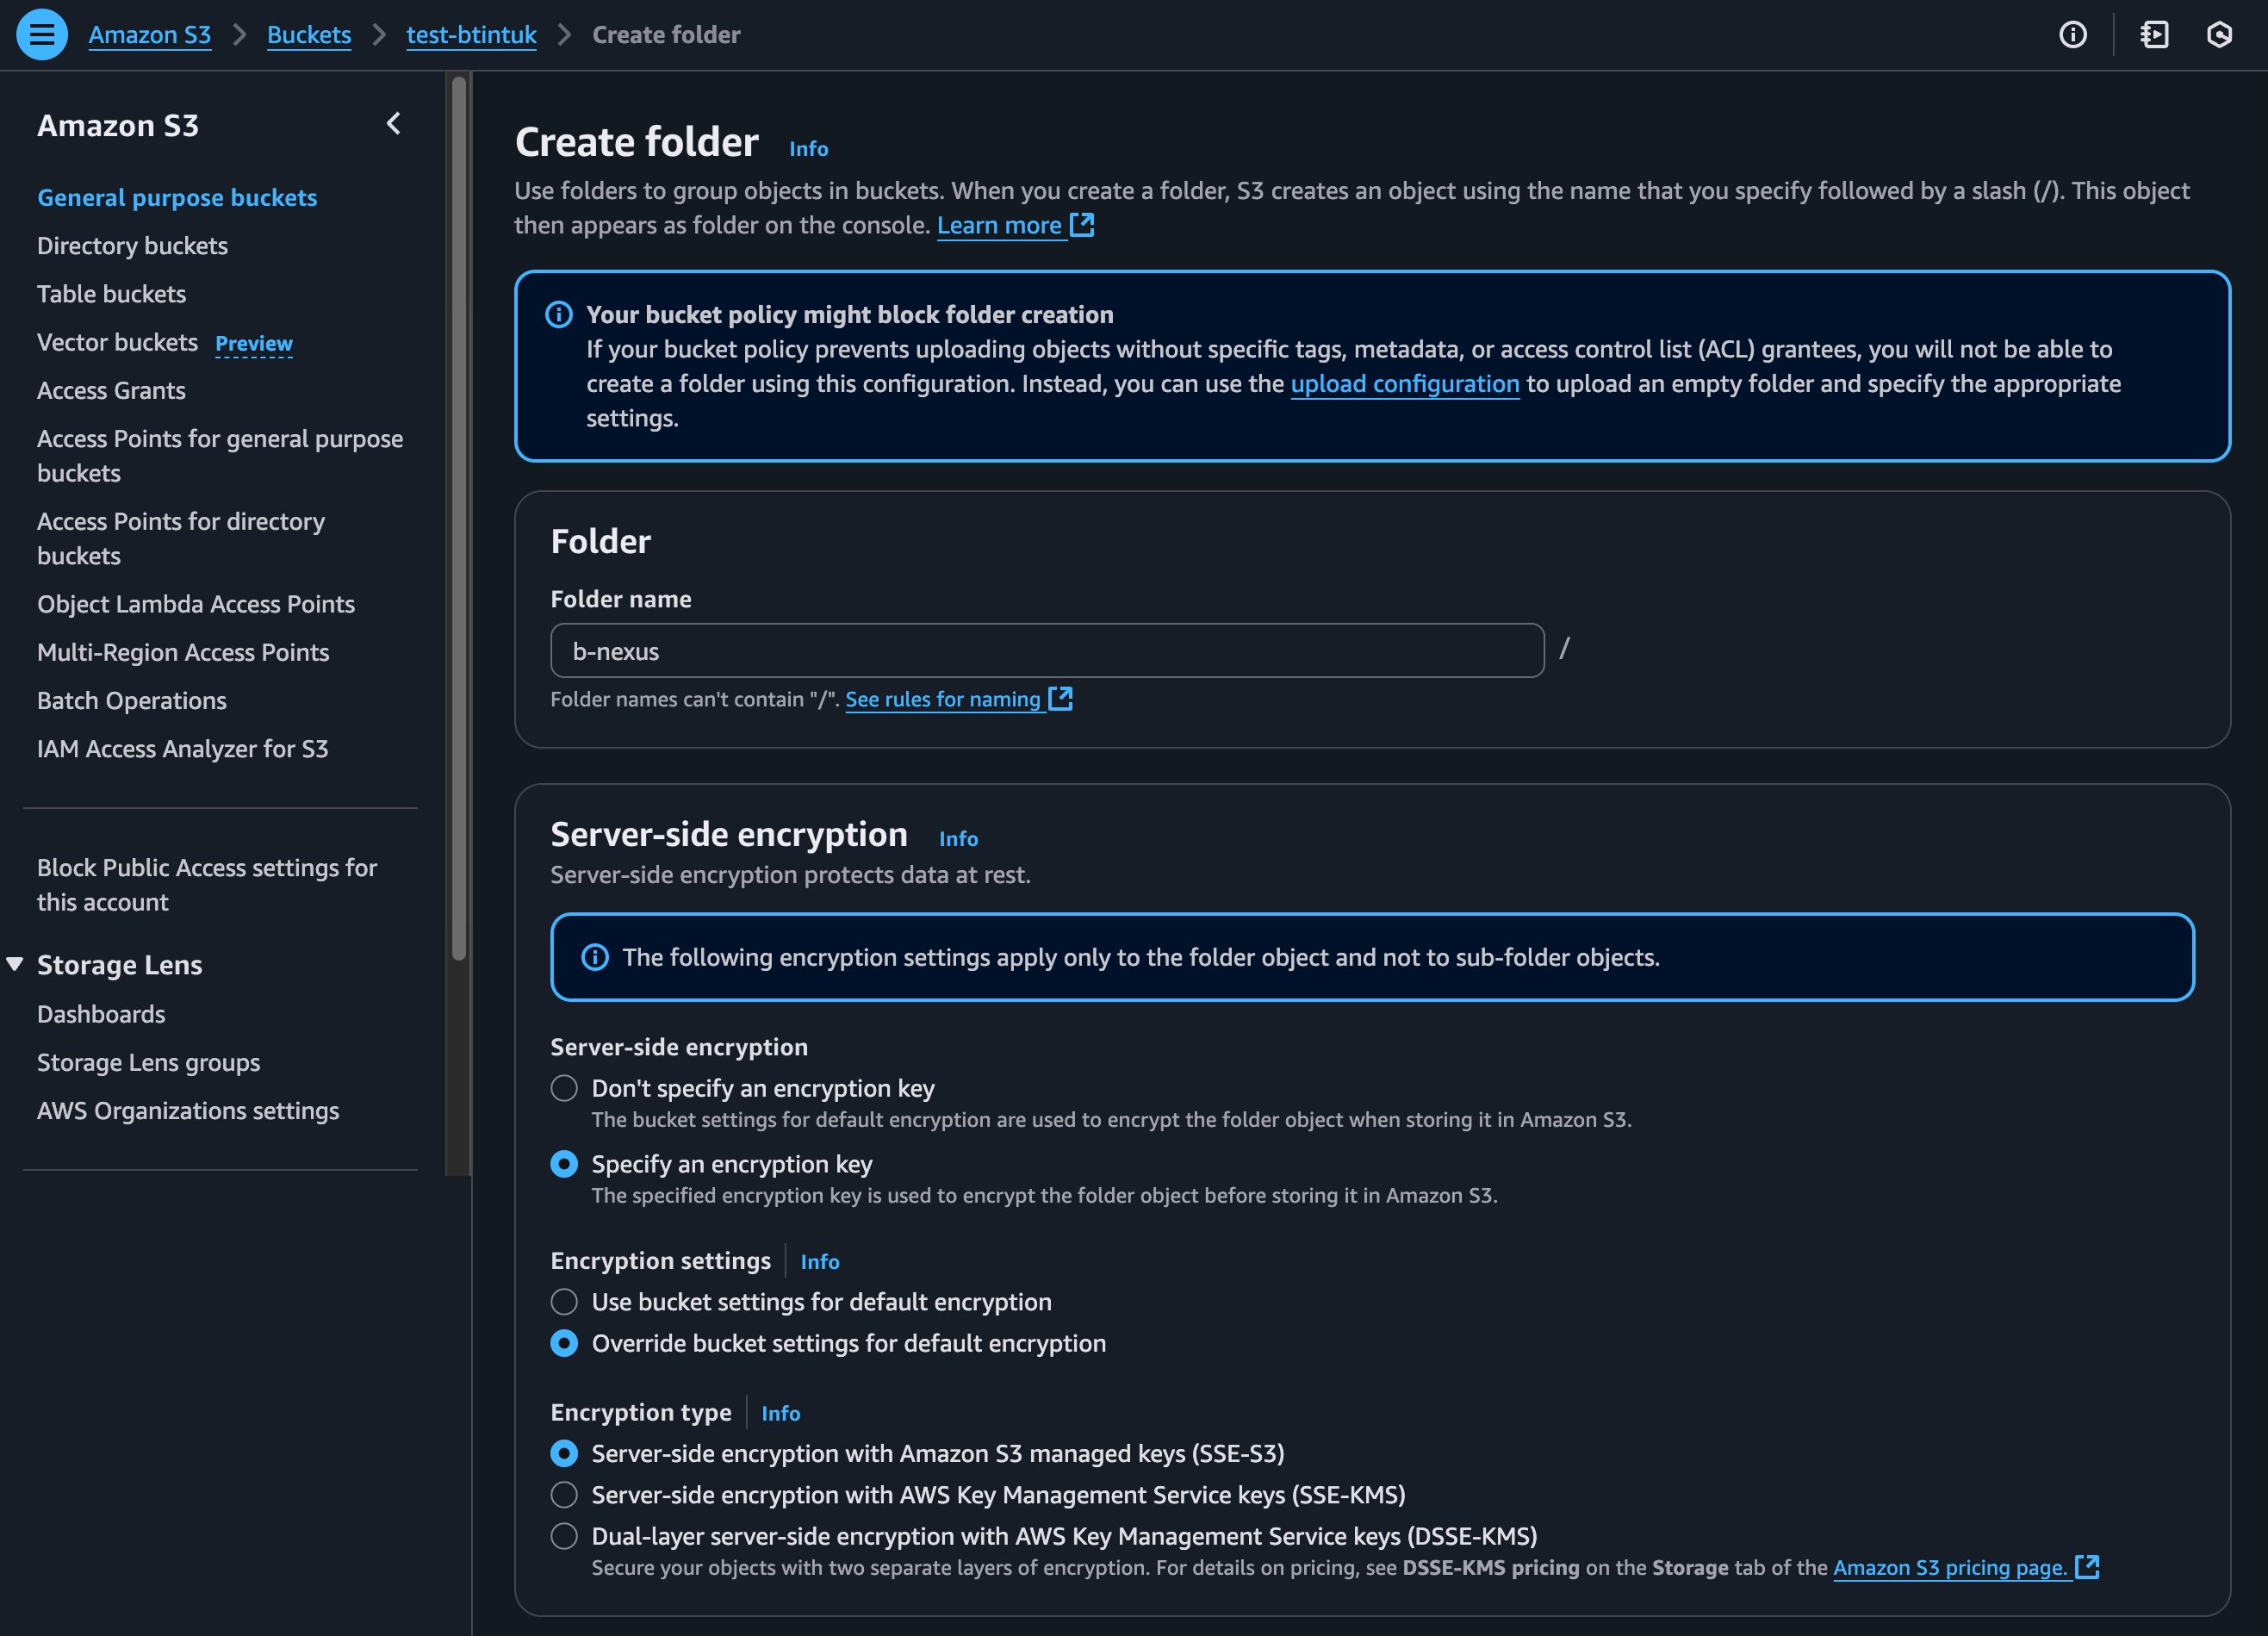
Create an S3 bucket in your AWS account. Deal with security when we create new S3 bucket, please refer to use encryption key for S3 bucket https://docs.aws.amazon.com/AmazonS3/latest/userguide/UsingServerSideEncryption.html
# Using AWS CLI
aws s3 mb s3://b-tintuk --region ap-southeast-1

# Enable versioning (recommended)
aws s3api put-bucket-versioning \
  --bucket b-tintuk \
  --versioning-configuration Status=Enabled

# Configure server-side encryption
aws s3api put-bucket-encryption \
  --bucket b-tintuk \
  --server-side-encryption-configuration '{
    "Rules": [{
      "ApplyServerSideEncryptionByDefault": {
        "SSEAlgorithm": "AES256"
      }
    }]
  }'
-
Open the Nexus website, navigate to
Admin>Settings>Repository>Blob Store>Create Blog Store.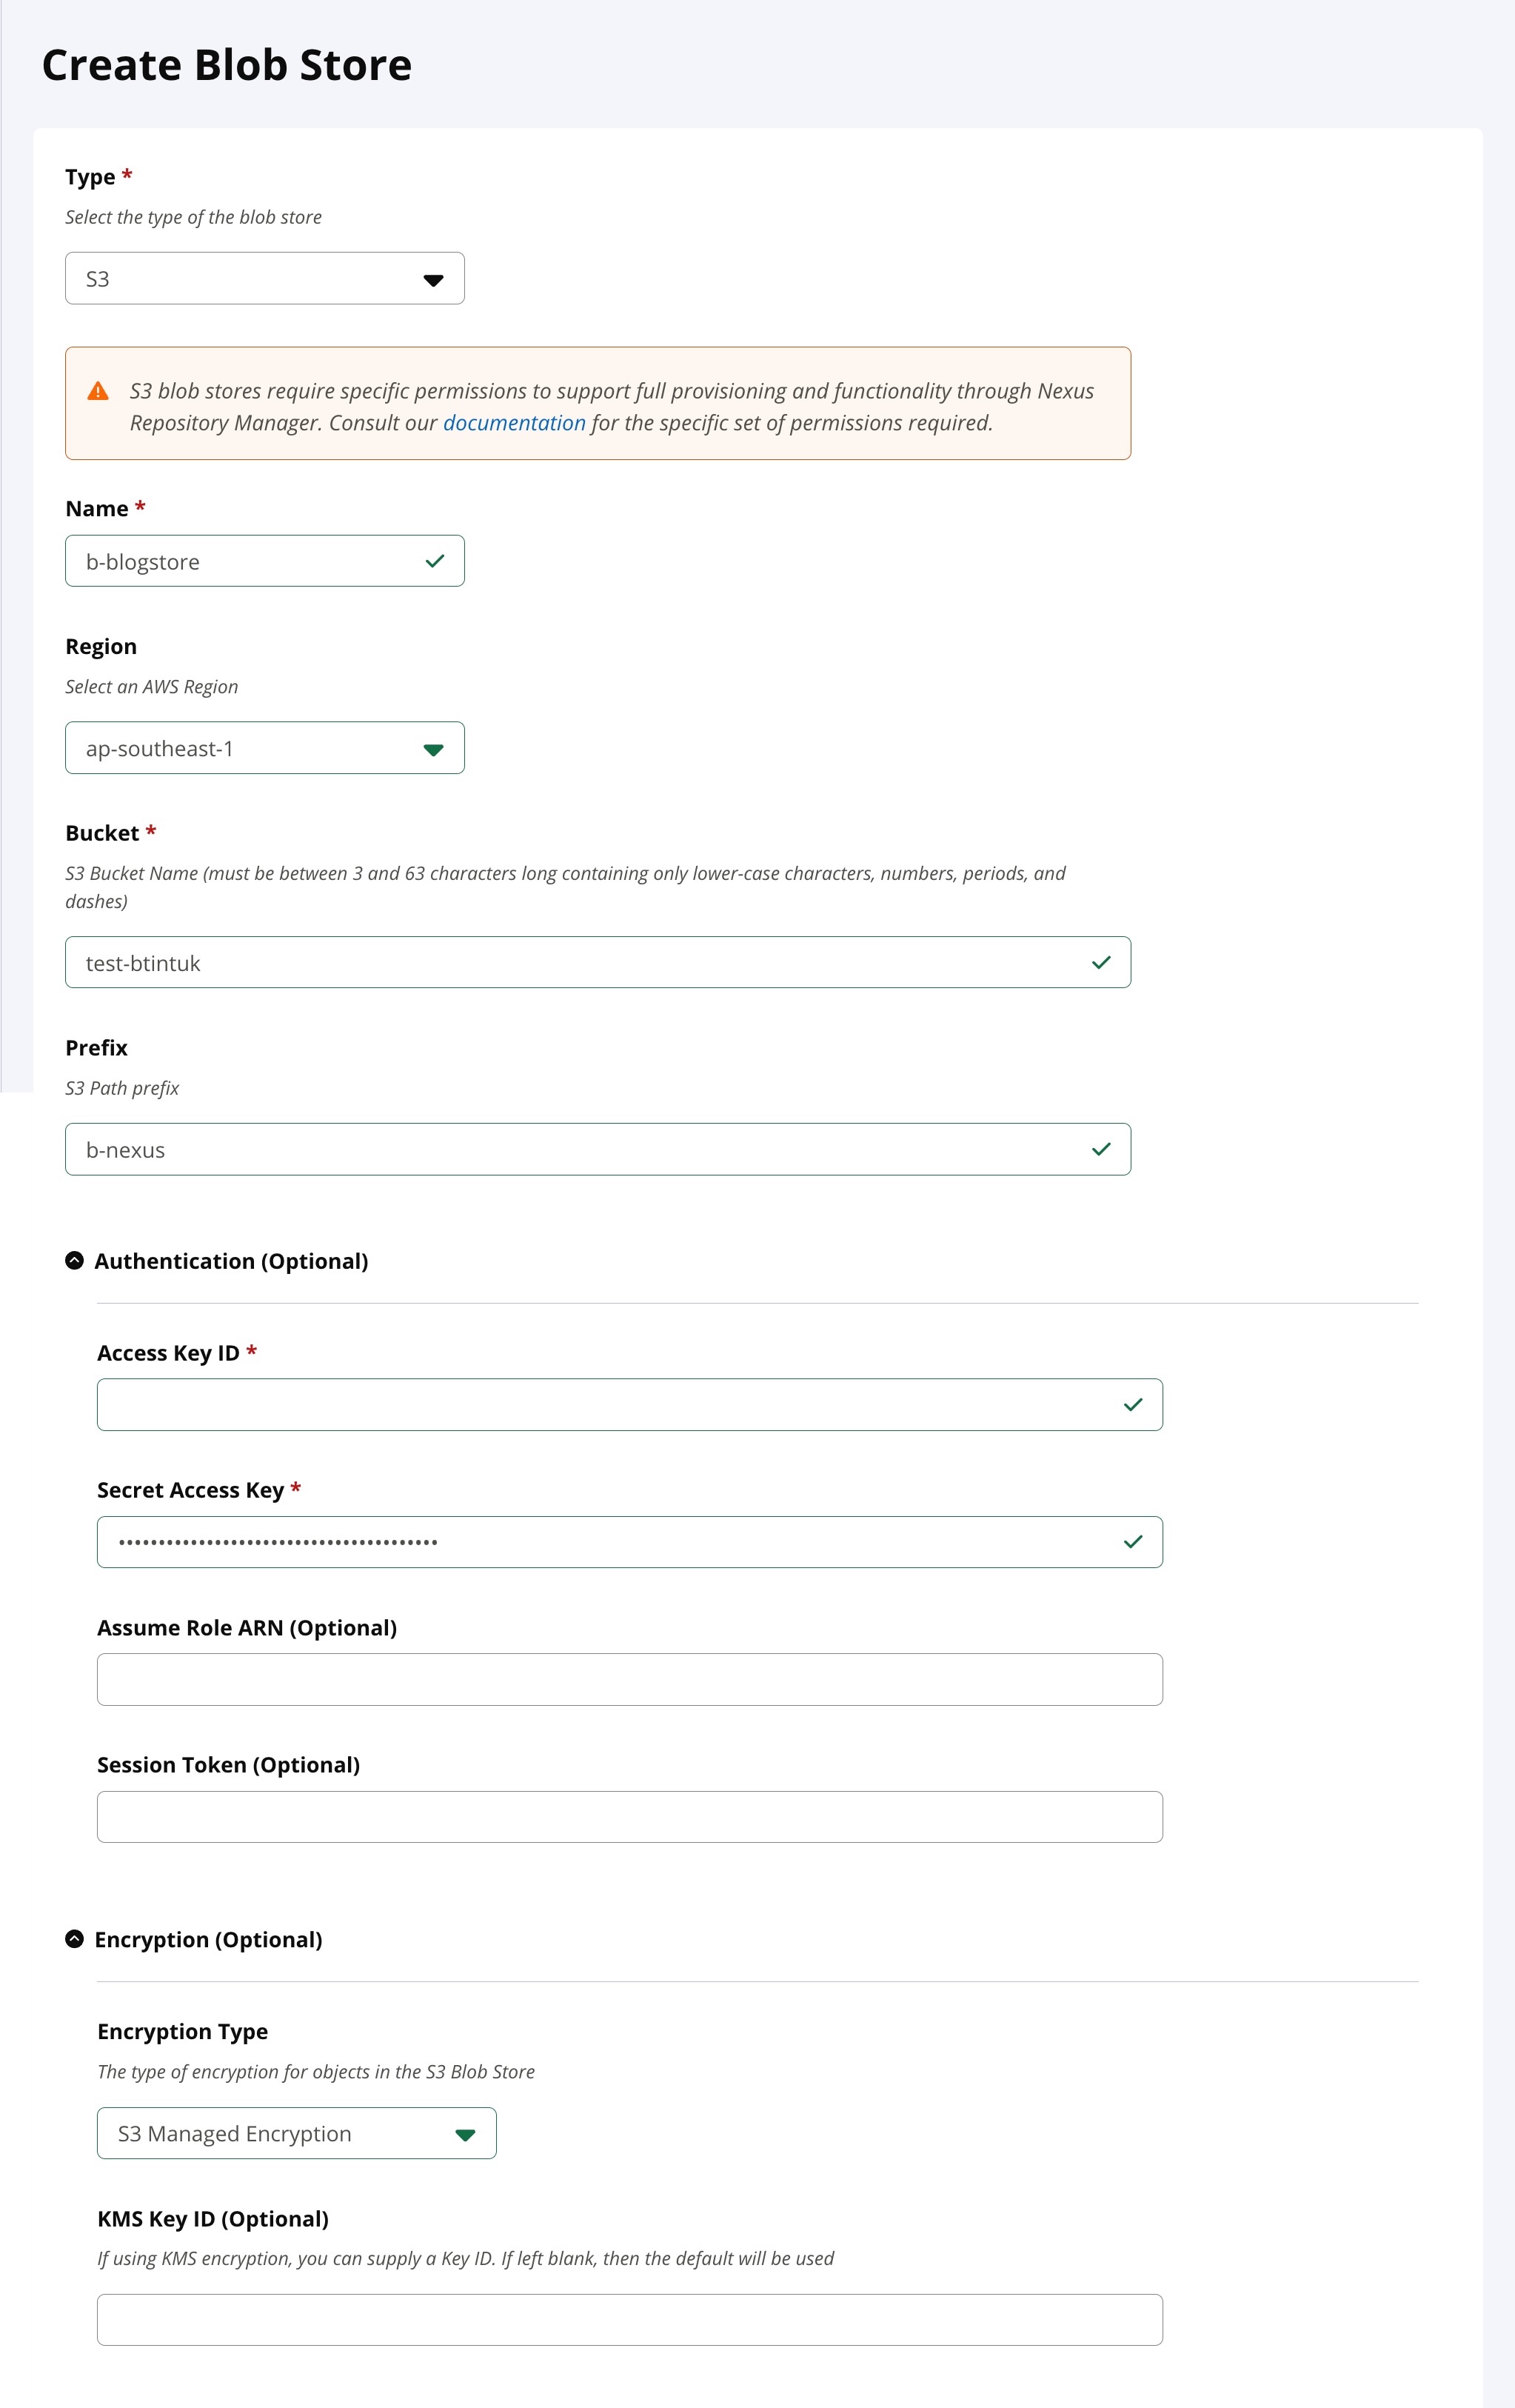
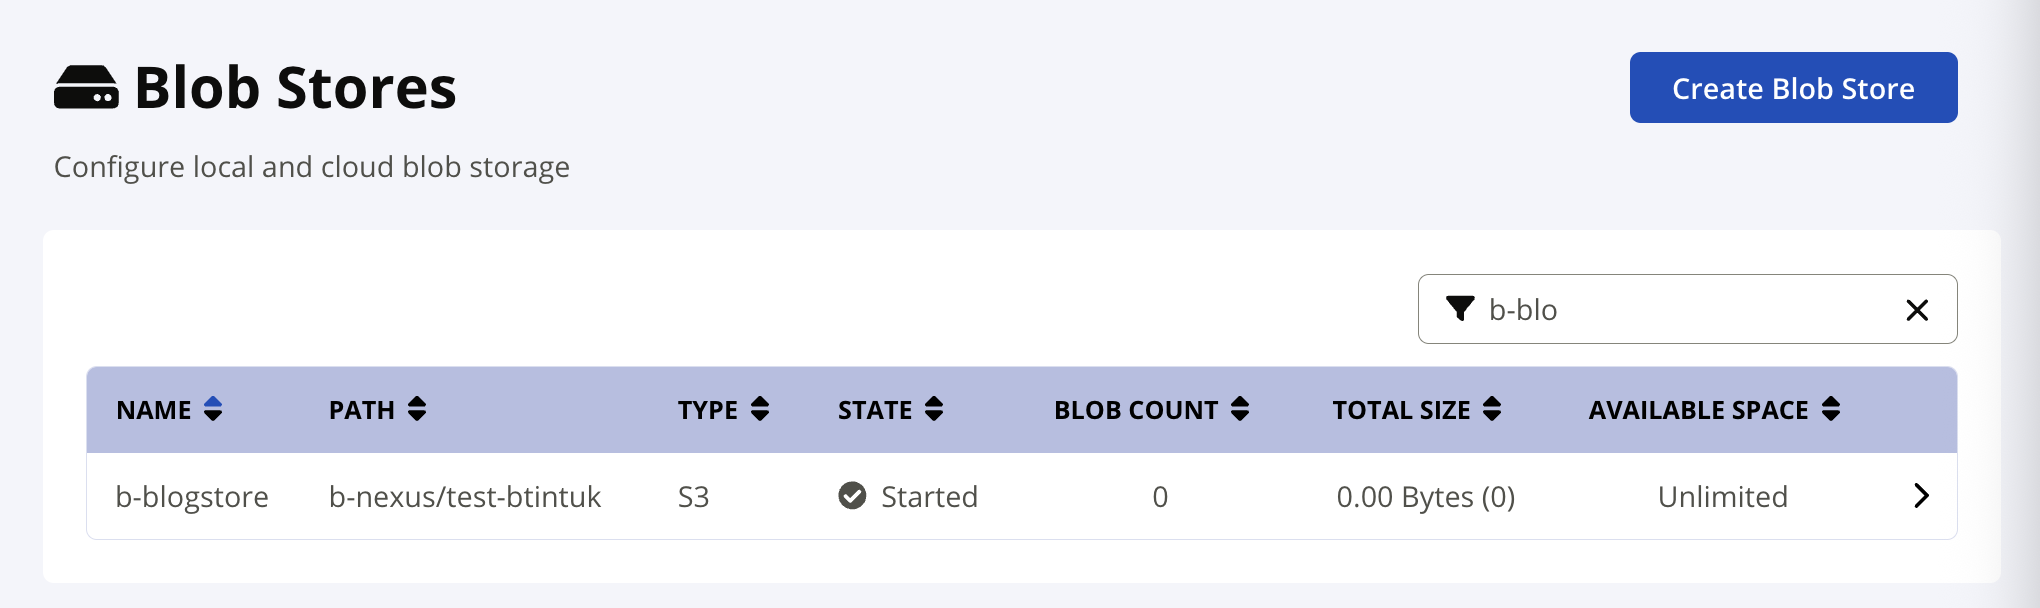
-
New blob store is created, we can use it for our repositories.
Repository Examples
Custom APT Repository
Host custom Debian packages that aren't available in standard repositories. Example: Google Chrome for Debian Bullseye
Step 1: Create a Hosted Raw Repository
- Open the Nexus website, navigate to
Admin>Settings>Repository>Repositories>Create Repository.- Select the recipe
raw (hosted)and clickNext. - Enter the name of the repository, for example
b-apt-chrome. - Select the blob store we created in the previous step.
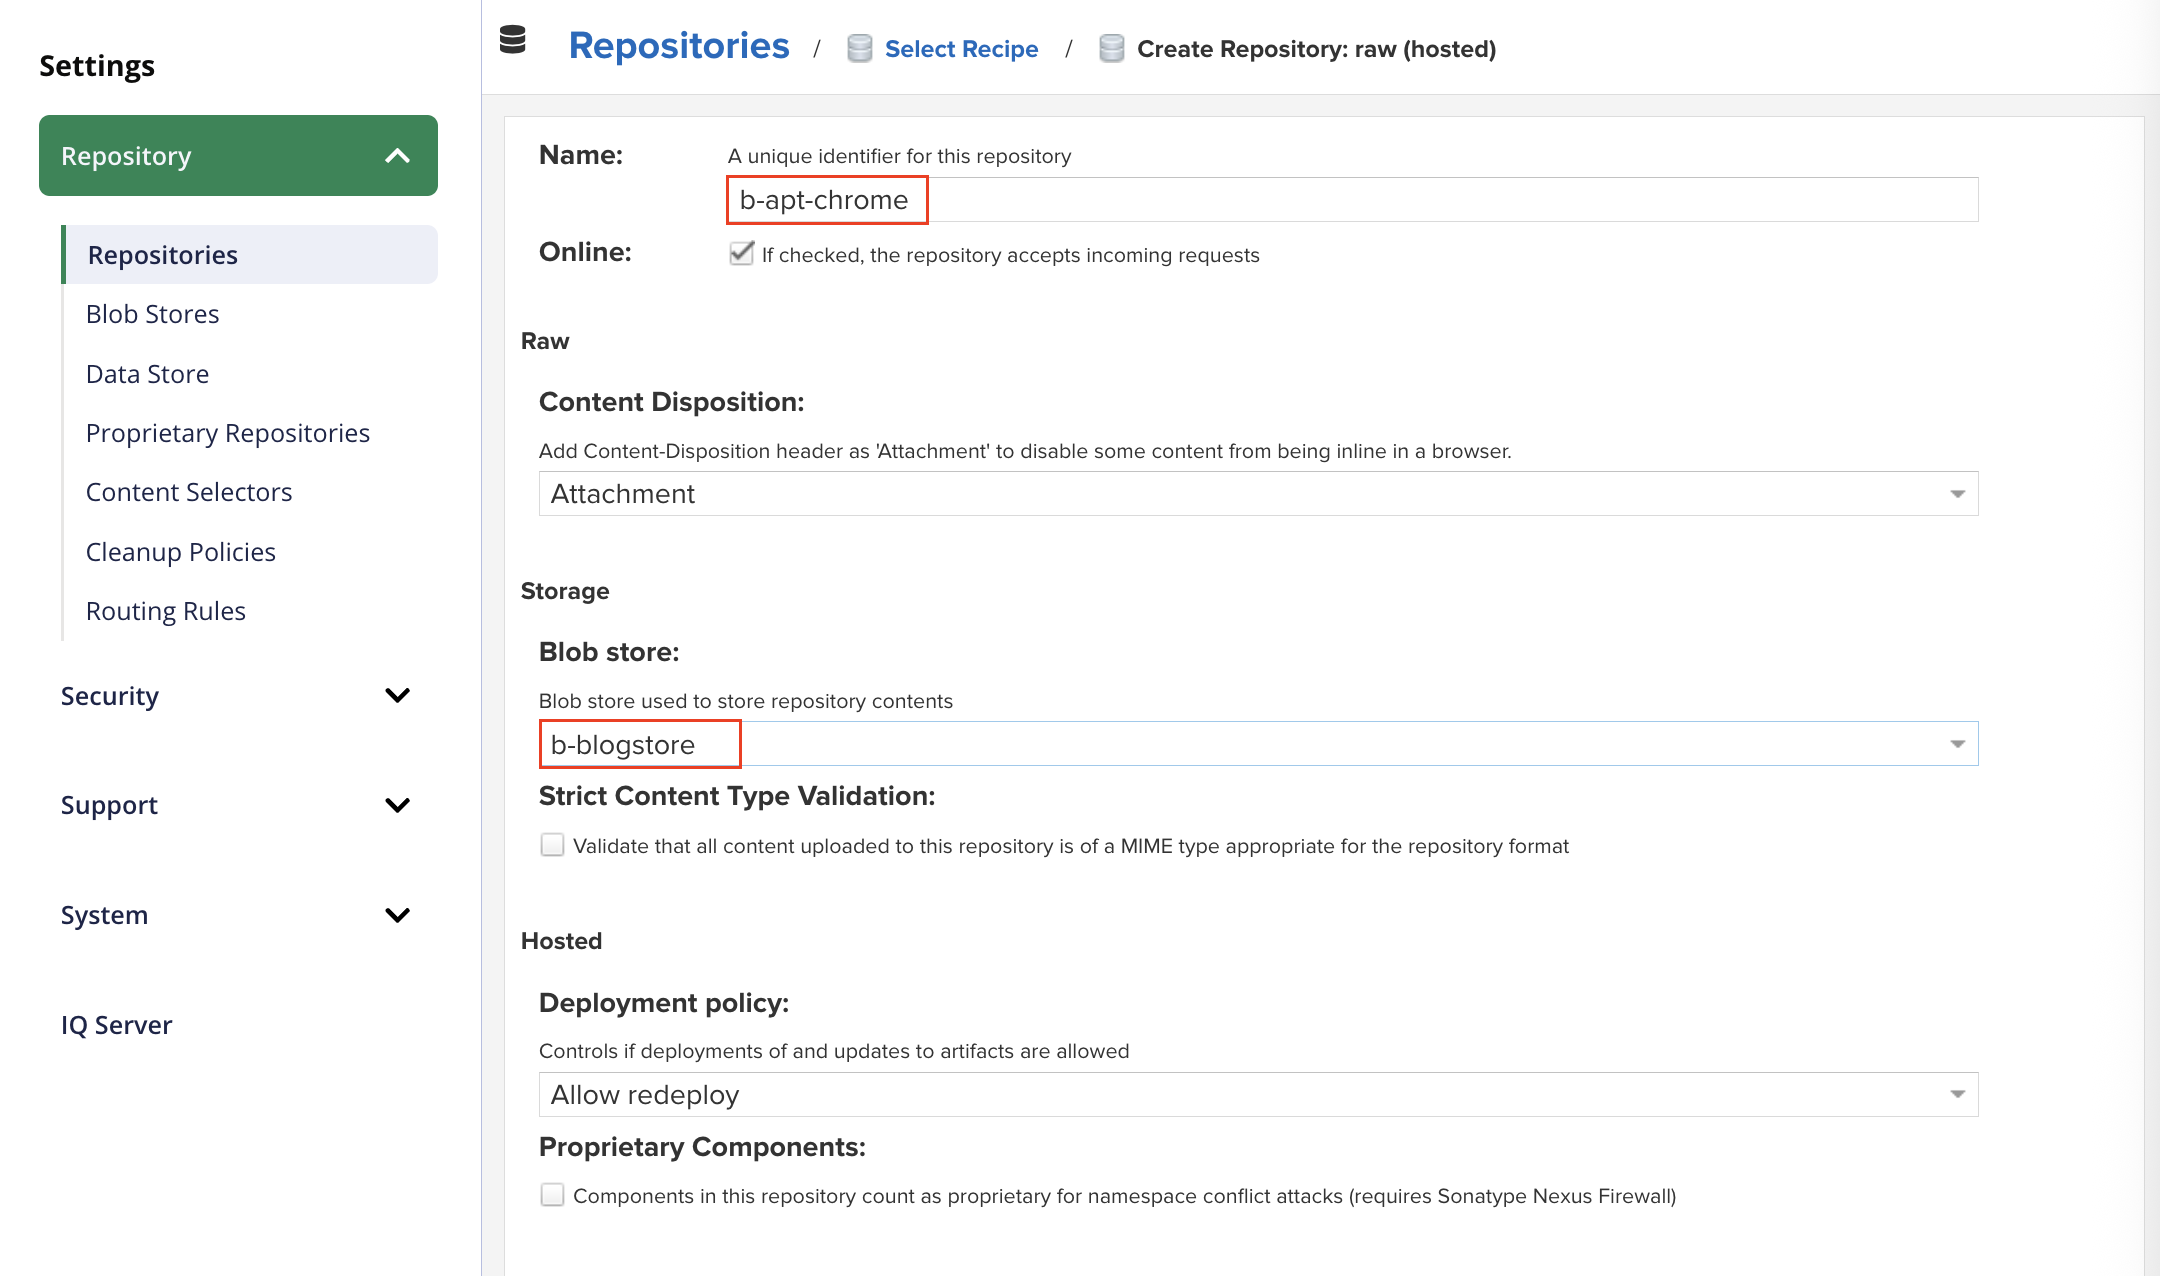
- Select the recipe
Step 2: Prepare the Package Structure
-
In this case we will use example with package
google-chrome-stable_102.0.5005.61-1_amd64.debin distro Debian Bullseye -
As we know this version of
google-chrome-stableis not available in Debian Bullseye any more, we can useNexusas apt repository to host this package.# Create directory structure
mkdir -p chrome-repo/pool/main/g
# Copy your .deb file
cp google-chrome-stable_102.0.5005.61-1_amd64.deb chrome-repo/pool/main/g/
# Generate package index
cd chrome-repo
docker run --rm -v "$PWD:/work" -w /work debian:bookworm-slim bash -c '
apt-get update && apt-get install -y dpkg-dev gzip &&
dpkg-scanpackages pool /dev/null | gzip -9c > dists/stable/main/binary-amd64/Packages.gz
'
# This will create the following directory structure:
├── dists
│ └── stable
│ └── main
│ └── binary-amd64
│ └── Packages.gz
└── pool
└── main
└── g
└── google-chrome-stable_102.0.5005.61-1_amd64.deb
Step 3: Create Repository in Nexus
- Open the
Nexuswebsite, navigate toAdmin>Settings>Repository>Repositories>Create Repository.- Select the recipe
raw (hosted)and clickNext. - Enter the name of the repository, for example
b-apt-chrome. - Select the blob store we created in the previous step.
- Select the recipe
Step 4: Upload Files
-
Upload the
distsandpooldirectories to theNexusrepository we created in the previous step withcurlcommand:# Set variables
export NEXUS_URL="https://nexus.tool.btin.info"
export NEXUS_REPO="b-apt-chrome"
export NEXUS_USER="admin"
export NEXUS_PASS="your_password"
# Upload package
curl -u "${NEXUS_USER}:${NEXUS_PASS}" \
--upload-file pool/main/g/google-chrome-stable_102.0.5005.61-1_amd64.deb \
"${NEXUS_URL}/repository/${NEXUS_REPO}/pool/main/g/google-chrome-stable_102.0.5005.61-1_amd64.deb"
# Upload package index
curl -u "${NEXUS_USER}:${NEXUS_PASS}" \
--upload-file dists/stable/main/binary-amd64/Packages.gz \
"${NEXUS_URL}/repository/${NEXUS_REPO}/dists/stable/main/binary-amd64/Packages.gz" -
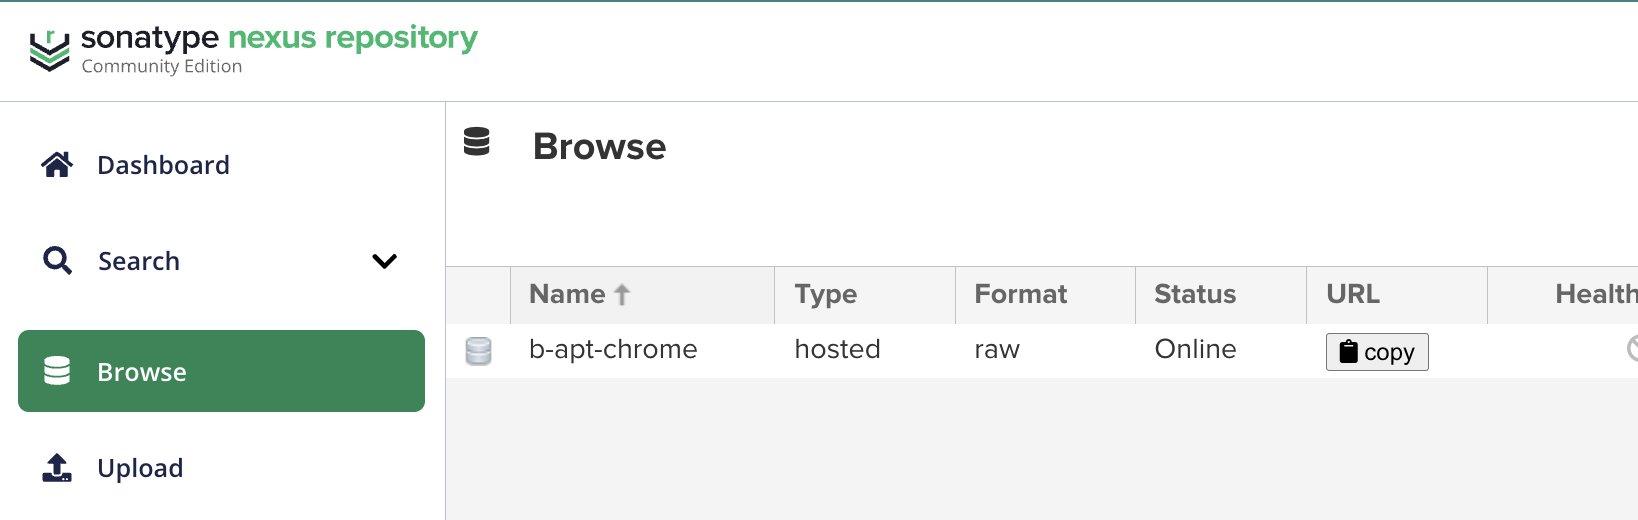
Check the repository in
Nexus, you should see the uploaded files.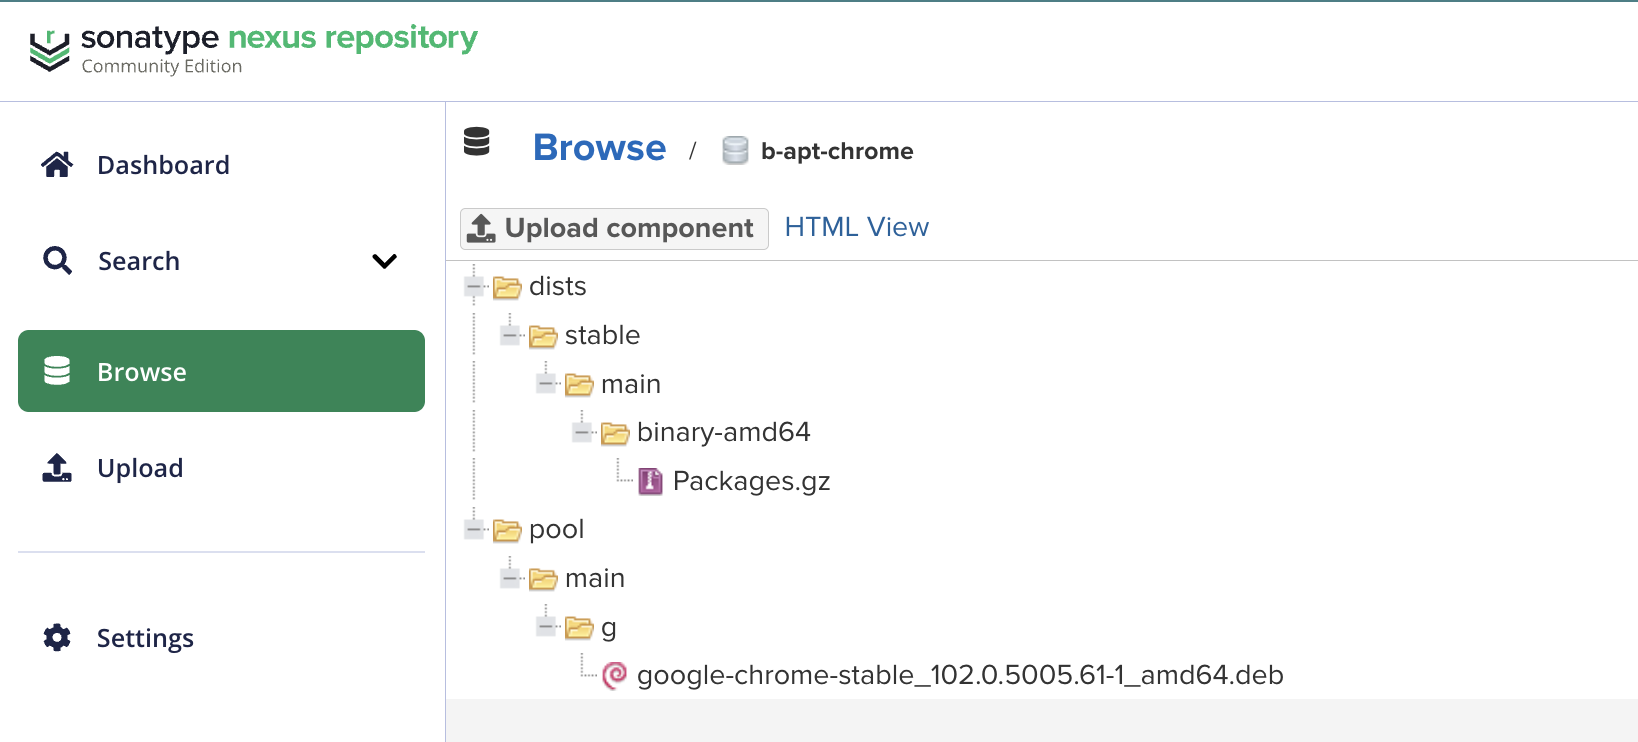
Step 5: Use the Repository
-
Verify the repository by adding it to your apt sources list:
# Start a Debian Bullseye Slim container
docker run -it debian:bullseye-slim bash

# Install necessary tools
export NEXUS_USER='admin'
export NEXUS_PASS='your_password'
export NEXUS_URL='nexus.tool.btin.info'
export NEXUS_REPO='b-apt-chrome'
echo "deb [trusted=yes] https://${NEXUS_USER}:${NEXUS_PASS}@${NEXUS_URL}/repository/${NEXUS_REPO}/ stable main" > /etc/apt/sources.list.d/b-apt-chrome.list
# Update the package list
apt-get update -qq
# Install the package
apt-get install -y google-chrome-stable
# After this operation, 760 MB of additional disk space will be used.
# Get:1 http://deb.debian.org/debian bullseye/main amd64 libapparmor1 amd64 2.13.6-10 [99.3 kB]
# Get:2 http://deb.debian.org/debian-security bullseye-security/main amd64 libcap2 amd64 1:2.44-1+deb11u1 [24.2 kB]
# Get:3 http://deb.debian.org/debian bullseye/main amd64 libargon2-1 amd64 0~20171227-0.2 [19.6 kB]
# Get:4 http://deb.debian.org/debian bullseye/main amd64 dmsetup amd64 2:1.02.175-2.1 [92.1 kB]
# Get:5 http://deb.debian.org/debian bullseye/main amd64 libdevmapper1.02.1 amd64 2:1.02.175-2.1 [143 kB]
# Get:6 http://deb.debian.org/debian bullseye/main amd64 libjson-c5 amd64 0.15-2+deb11u1 [42.9 kB]
# Get:7 http://deb.debian.org/debian bullseye/main amd64 libcryptsetup12 amd64 2:2.3.7-1+deb11u1 [248 kB]
# Get:8 http://deb.debian.org/debian bullseye/main amd64 libip4tc2 amd64 1.8.7-1 [34.6 kB]
# Get:9 http://deb.debian.org/debian bullseye/main amd64 libkmod2 amd64 28-1 [55.6 kB]
# Get:10 http://deb.debian.org/debian-security bullseye-security/main amd64 systemd amd64 247.3-7+deb11u6 [4501 kB]
# Get:11 https://nexus.tool.btin.info/repository/b-apt-chrome stable/main amd64 google-chrome-stable amd64 102.0.5005.61-1 [84.7 MB]
# Get:12 http://deb.debian.org/debian-security bullseye-security/main amd64 systemd-sysv amd64 247.3-7+deb11u6 [114 kB]
# Get:13 http://deb.debian.org/debian bullseye/main amd64 libdbus-1-3 amd64 1.12.28-0+deb11u1 [223 kB]
# Get:14 http://deb.debian.org/debian-security bullseye-security/main amd64 libexpat1 amd64 2.2.10-2+deb11u7 [99.2 kB]
# Get:15 http://deb.debian.org/debian bullseye/main amd64 dbus amd64 1.12.28-0+deb11u1 [244 kB]
# Get:16 http://deb.debian.org/debian-security bullseye-security/main amd64 perl-modules-5.32 all 5.32.1-4+deb11u4 [2824 kB]
#
# ...
#
# Setting up libgtk-3-bin (3.24.24-4+deb11u4) ...
# Setting up libvte-2.91-0:amd64 (0.62.3-1) ...
# Setting up google-chrome-stable (102.0.5005.61-1) ...
# update-alternatives: using /usr/bin/google-chrome-stable to provide /usr/bin/x-www-browser (x-www-browser) in auto mode
# update-alternatives: using /usr/bin/google-chrome-stable to provide /usr/bin/gnome-www-browser (gnome-www-browser) in auto mode
# update-alternatives: using /usr/bin/google-chrome-stable to provide /usr/bin/google-chrome (google-chrome) in auto mode
# Setting up termit (3.1-1) ...
# update-alternatives: using /usr/bin/termit to provide /usr/bin/x-terminal-emulator (x-terminal-emulator) in auto mode
# update-alternatives: warning: skip creation of /usr/share/man/man1/x-terminal-emulator.1.gz because associated file /usr/share/man/man1/termit.1.gz (of link group x-terminal-emulator) doesn't exist
# Setting up liblwp-protocol-https-perl (6.10-1) ...
# Setting up libwww-perl (6.52-1) ...
# Setting up libxml-parser-perl:amd64 (2.46-2) ...
# Setting up libxml-twig-perl (1:3.52-1) ...
# Setting up libnet-dbus-perl (1.2.0-1+b1) ...
# Processing triggers for libc-bin (2.31-13+deb11u13) ...
# Processing triggers for ca-certificates (20210119) ...
# Updating certificates in /etc/ssl/certs...
# 0 added, 0 removed; done.
# Running hooks in /etc/ca-certificates/update.d...
# done.
# Processing triggers for libgdk-pixbuf-2.0-0:amd64 (2.42.2+dfsg-1+deb11u3) ...# Verify the installation
apt-cache policy google-chrome-stable
# google-chrome-stable:
# Installed: 102.0.5005.61-1
# Candidate: 102.0.5005.61-1
# Version table:
# *** 102.0.5005.61-1 500
# 500 https://nexus.tool.btin.info/repository/b-apt-chrome stable/main amd64 Packages
# 100 /var/lib/dpkg/status
dpkg --list | grep chrome
# ii google-chrome-stable 102.0.5005.61-1 amd64 The web browser from Google
google-chrome-stable --version
# Google Chrome 102.0.5005.61
PyPI Repository
A PyPI Proxy Repository acts as an intelligent middleman between your development environment and the official Python Package Index (PyPI).
- Proxy: Forwards requests to upstream PyPI
- Cache: Stores downloaded packages locally
- Optimization: Reduces bandwidth and improves speed
- Reliability: Continues working even if PyPI is down
Instead of downloading packages directly from PyPI every time, Nexus caches them locally for faster subsequent downloads.
Step 1: Create a PyPI Proxy Repository
- Open the Nexus website, navigate to
Admin>Settings>Repository>Repositories>Create Repository.- Select the recipe
pypi (proxy)and clickNext. - Enter the name of the repository, for example
b-pypi-proxy.- Configure Repository Settings
Blob Store: Select the blob store you created earlier- Advanced Settings
Negative Cache TTL: 1440 (minutes)
Content Max Age: 1440 (minutes)
Metadata Max Age: 1440 (minutes)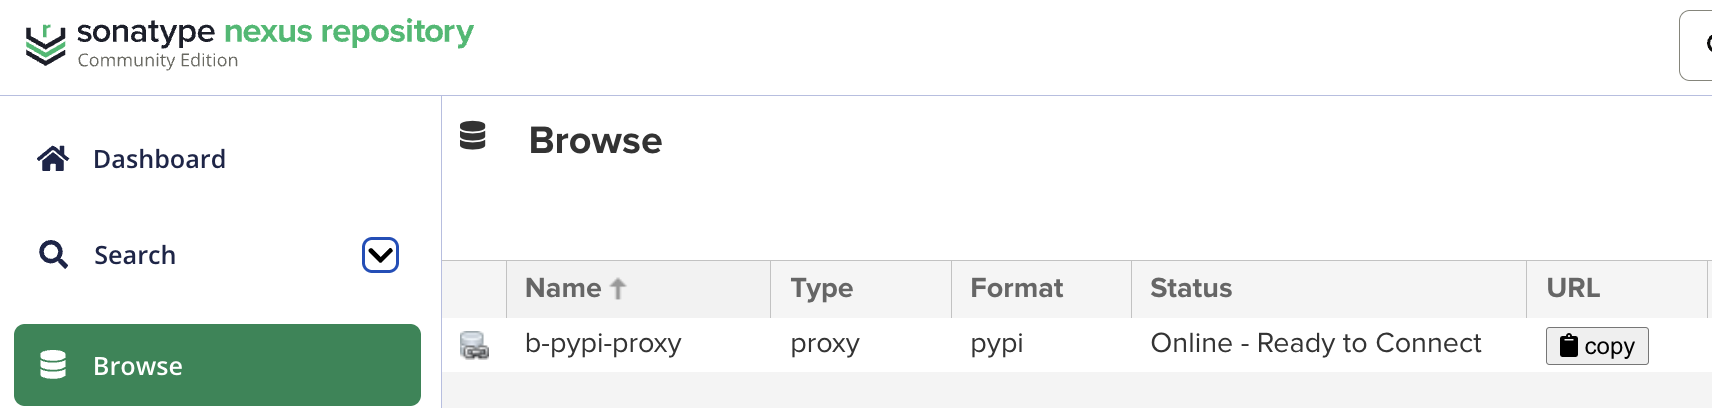
- Set the remote storage URL to the official PyPI URL:
https://pypi.org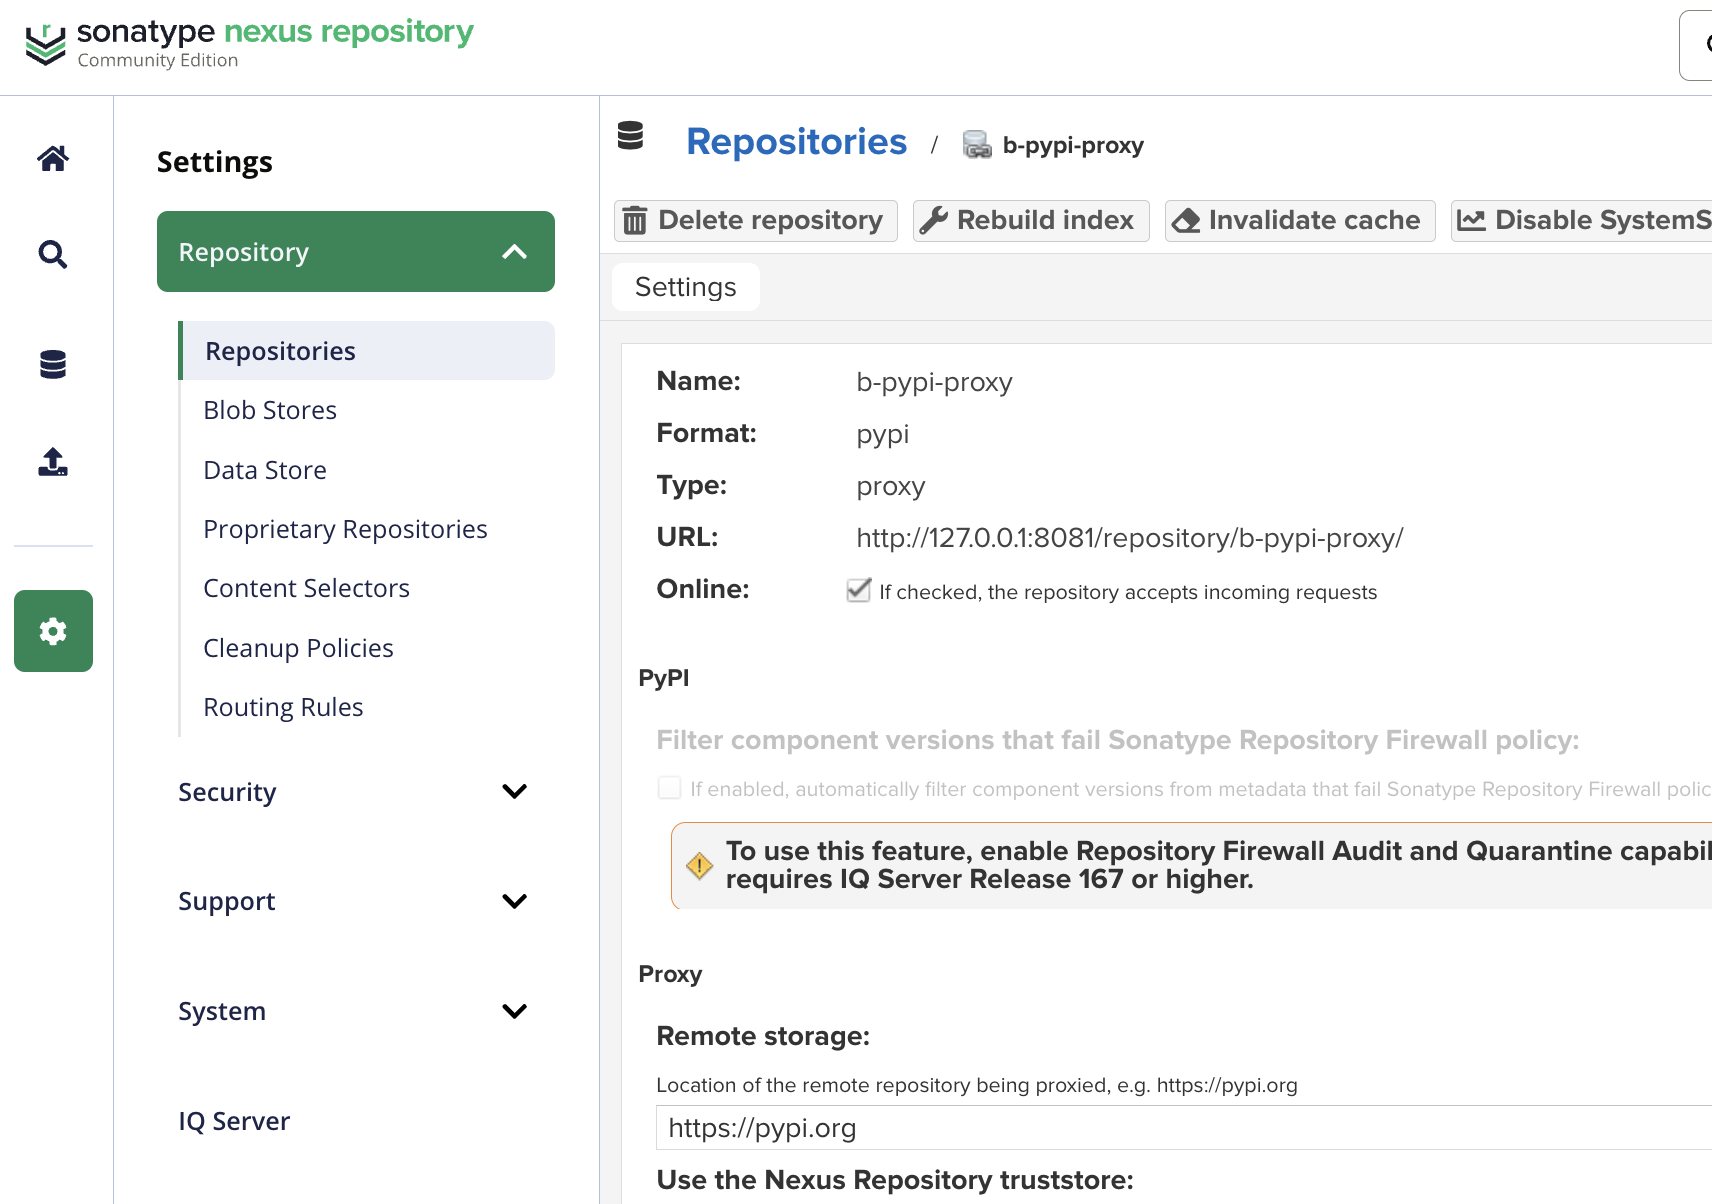
- Select the recipe
Step 2: Configure PyPI Client
-
Configure your
pipclient to use the Nexus PyPI Proxy Repository by adding the following to yourpip.confmkdir -p ~/.config/pip
export NEXUS_URL="nexus.tool.btin.info"
export NEXUS_PYTHON_REPO="b-pypi-proxy"
export NEXUS_USER="admin"
export NEXUS_PASS="your_password"
cat > ~/.config/pip/pip.conf << EOF
[global]
index-url = https://${NEXUS_USER}:${NEXUS_PASS}@${NEXUS_URL}/repository/${NEXUS_PYTHON_REPO}/simple
trusted-host = nexus.tool.btin.info
timeout = 60
retries = 3
[install]
trusted-host = nexus.tool.btin.info
EOF -
Verify the configuration by running:
- Within a Docker container:
docker run -it python:3.12-slim bash
pip install boto3
# (Looking in indexes: https://admin:****@nexus.tool.btin.info/repository/b-pypi-proxy/simple)
# (Collecting boto3)
# (Downloading https://nexus.tool.btin.info/repository/b-pypi-proxy/packages/boto3/1.39.9/boto3-1.39.9-py3-none-any.whl (139 kB))
# (Collecting botocore<1.40.0,>=1.39.9 (from boto3))
# (Downloading https://nexus.tool.btin.info/repository/b-pypi-proxy/packages/botocore/1.39.9/botocore-1.39.9-py3-none-any.whl (13.9 MB))
# (━━━━━━━━━━━━━━━━━━━━━━━━━━━━━━━━━━━━━━━━ 13.9/13.9 MB 5.9 MB/s eta 0:00:00)
# (Collecting jmespath<2.0.0,>=0.7.1 (from boto3))
# (Downloading https://nexus.tool.btin.info/repository/b-pypi-proxy/packages/jmespath/1.0.1/jmespath-1.0.1-py3-none-any.whl (20 kB))
# (Collecting s3transfer<0.14.0,>=0.13.0 (from boto3))
# (Downloading https://nexus.tool.btin.info/repository/b-pypi-proxy/packages/s3transfer/0.13.1/s3transfer-0.13.1-py3-none-any.whl (85 kB))
# (Collecting python-dateutil<3.0.0,>=2.1 (from botocore<1.40.0,>=1.39.9->boto3))
# (Downloading https://nexus.tool.btin.info/repository/b-pypi-proxy/packages/python-dateutil/2.9.0.post0/python_dateutil-2.9.0.post0-py2.py3-none-any.whl (229 kB))
# (Requirement already satisfied: urllib3!=2.2.0,<3,>=1.25.4 in /usr/local/lib/python3.12/site-packages (from botocore<1.40.0,>=1.39.9->boto3) (2.5.0))
# (Collecting six>=1.5 (from python-dateutil<3.0.0,>=2.1->botocore<1.40.0,>=1.39.9->boto3))
# (Downloading https://nexus.tool.btin.info/repository/b-pypi-proxy/packages/six/1.17.0/six-1.17.0-py2.py3-none-any.whl (11 kB))
# (Installing collected packages: six, jmespath, python-dateutil, botocore, s3transfer, boto3)
# (Successfully installed boto3-1.39.9 botocore-1.39.9 jmespath-1.0.1 python-dateutil-2.9.0.post0 s3transfer-0.13.1 six-1.17.0)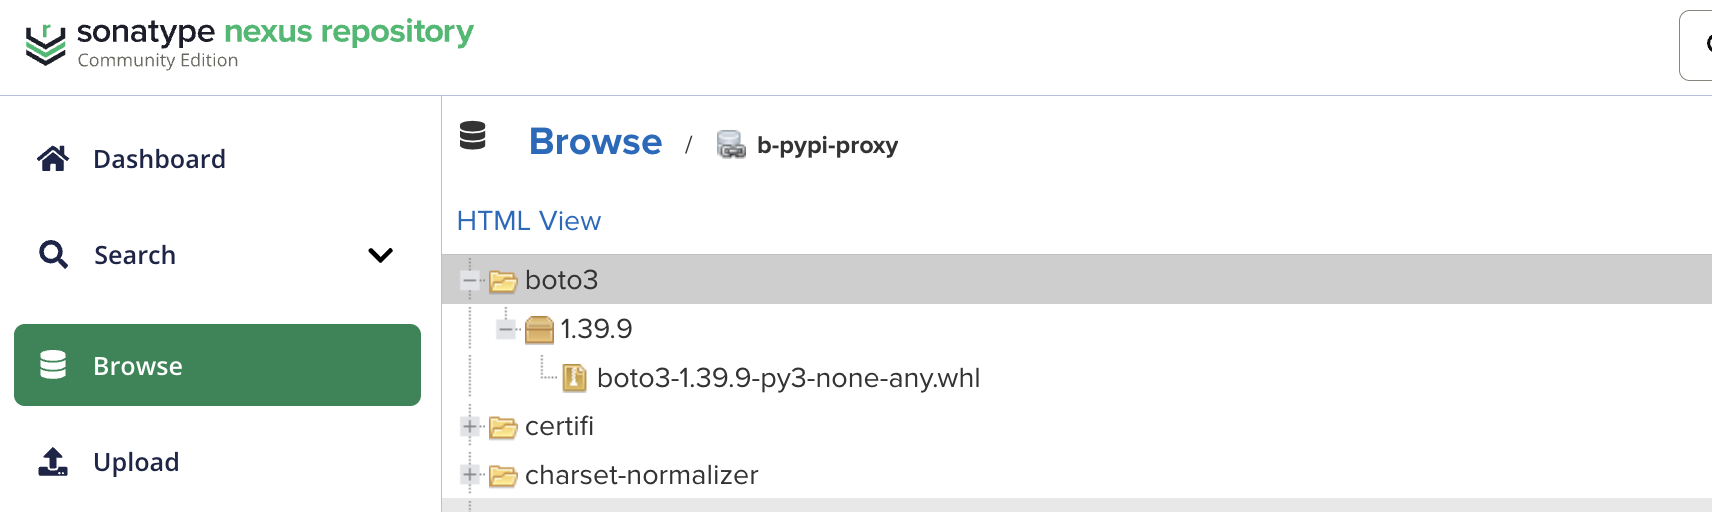
- Or directly from the host machine:
pip install --index-url https://${NEXUS_USER}:${NEXUS_PASS}@${NEXUS_URL}/repository/${NEXUS_PYTHON_REPO}/simple/ boto3
NPM Registry
A NPM Proxy Repository acts as an intelligent middleman between your development environment and the official NPM registry. We will use nexus npm as proxy and hosted repository for our custom packages. And use Nexus Repository Group Repository to combine both proxy and hosted repositories.
Step 1: Create a NPM Repository
-
With Proxy Repository
- Open the Nexus website, navigate to
Admin>Settings>Repository>Repositories>Create Repository.- Select the recipe
npm (proxy)and clickNext. - Enter the name of the repository, for example
b-npm-proxy.- Configure Repository Settings
Blob Store: Select the blob store you created earlier- Advanced Settings
Negative Cache TTL: 1440 (minutes)
Content Max Age: 1440 (minutes)
Metadata Max Age: 1440 (minutes) - Set the remote storage URL to the official NPM registry URL:
https://registry.npmjs.org/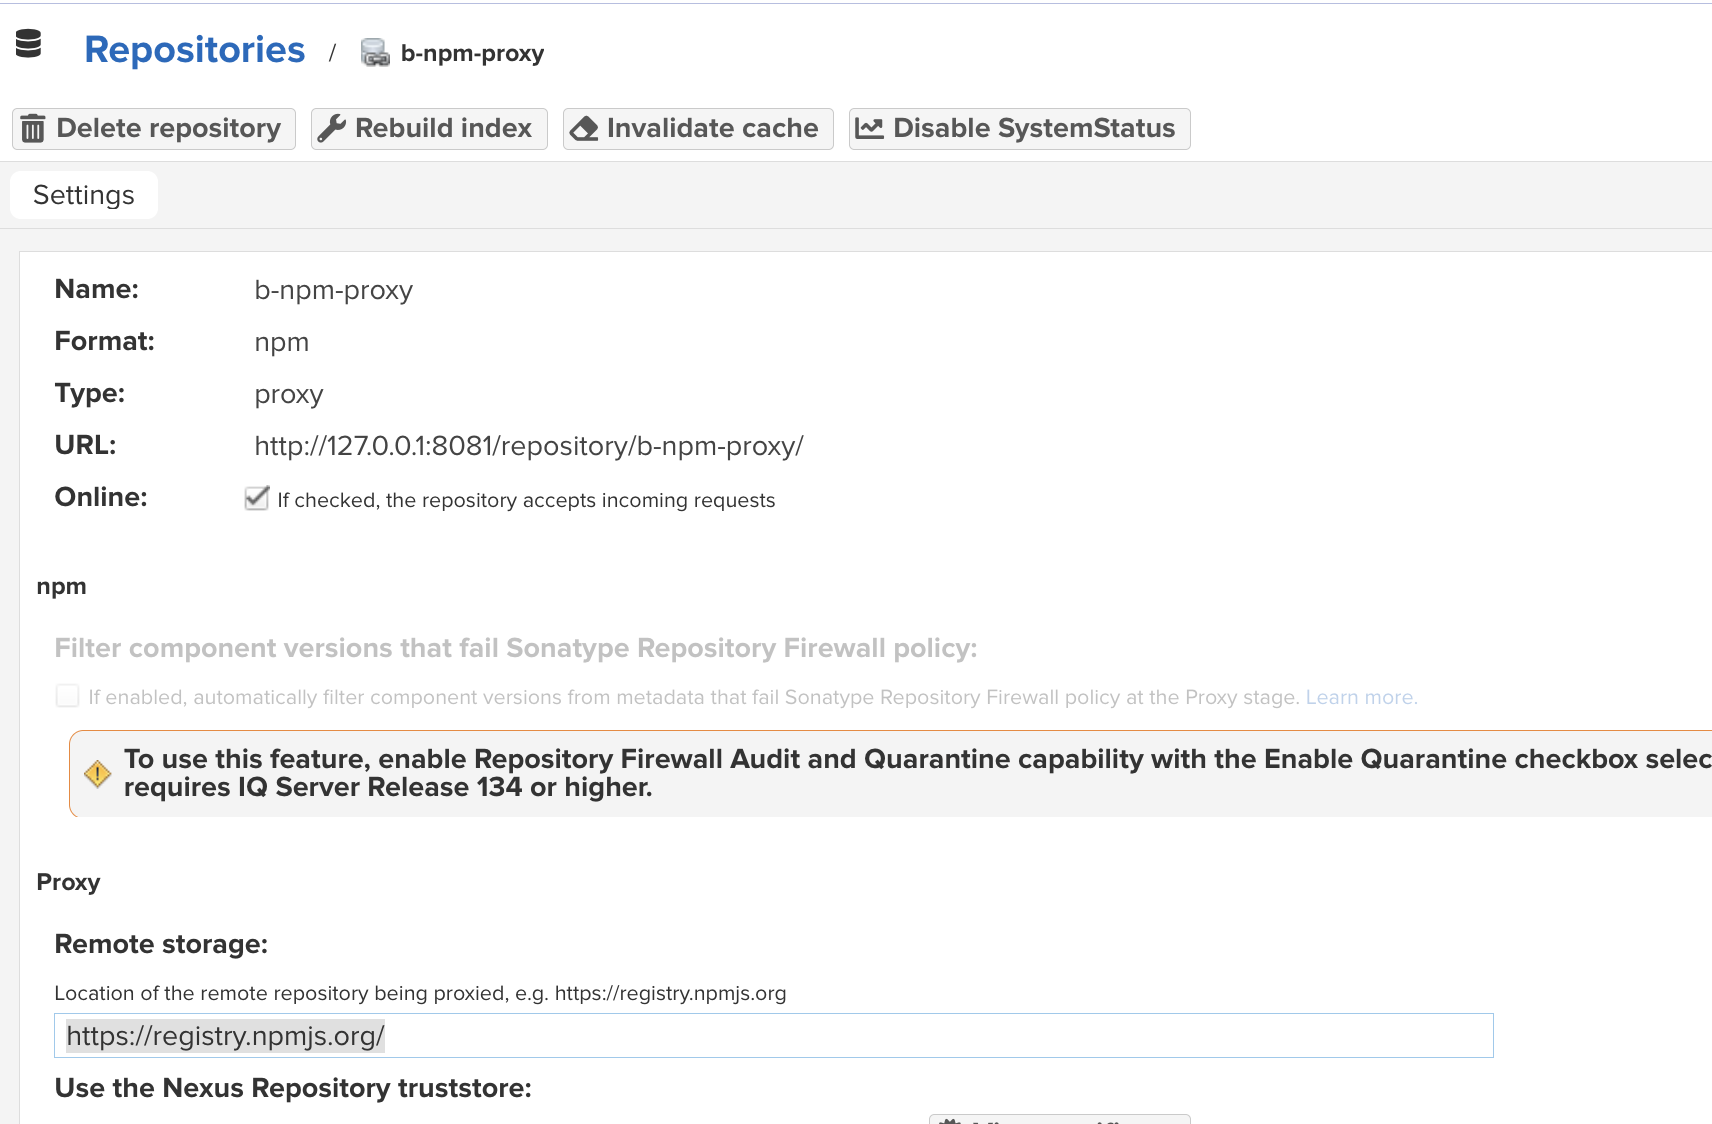
- Select the recipe
- Open the Nexus website, navigate to
-
With Hosted Repository
- Open the Nexus website, navigate to
Admin>Settings>Repository>Repositories>Create Repository.- Select the recipe
npm (hosted)and clickNext. - Enter the name of the repository, for example
b-npm-hosted.- Configure Repository Settings
Blob Store: Select the blob store you created earlier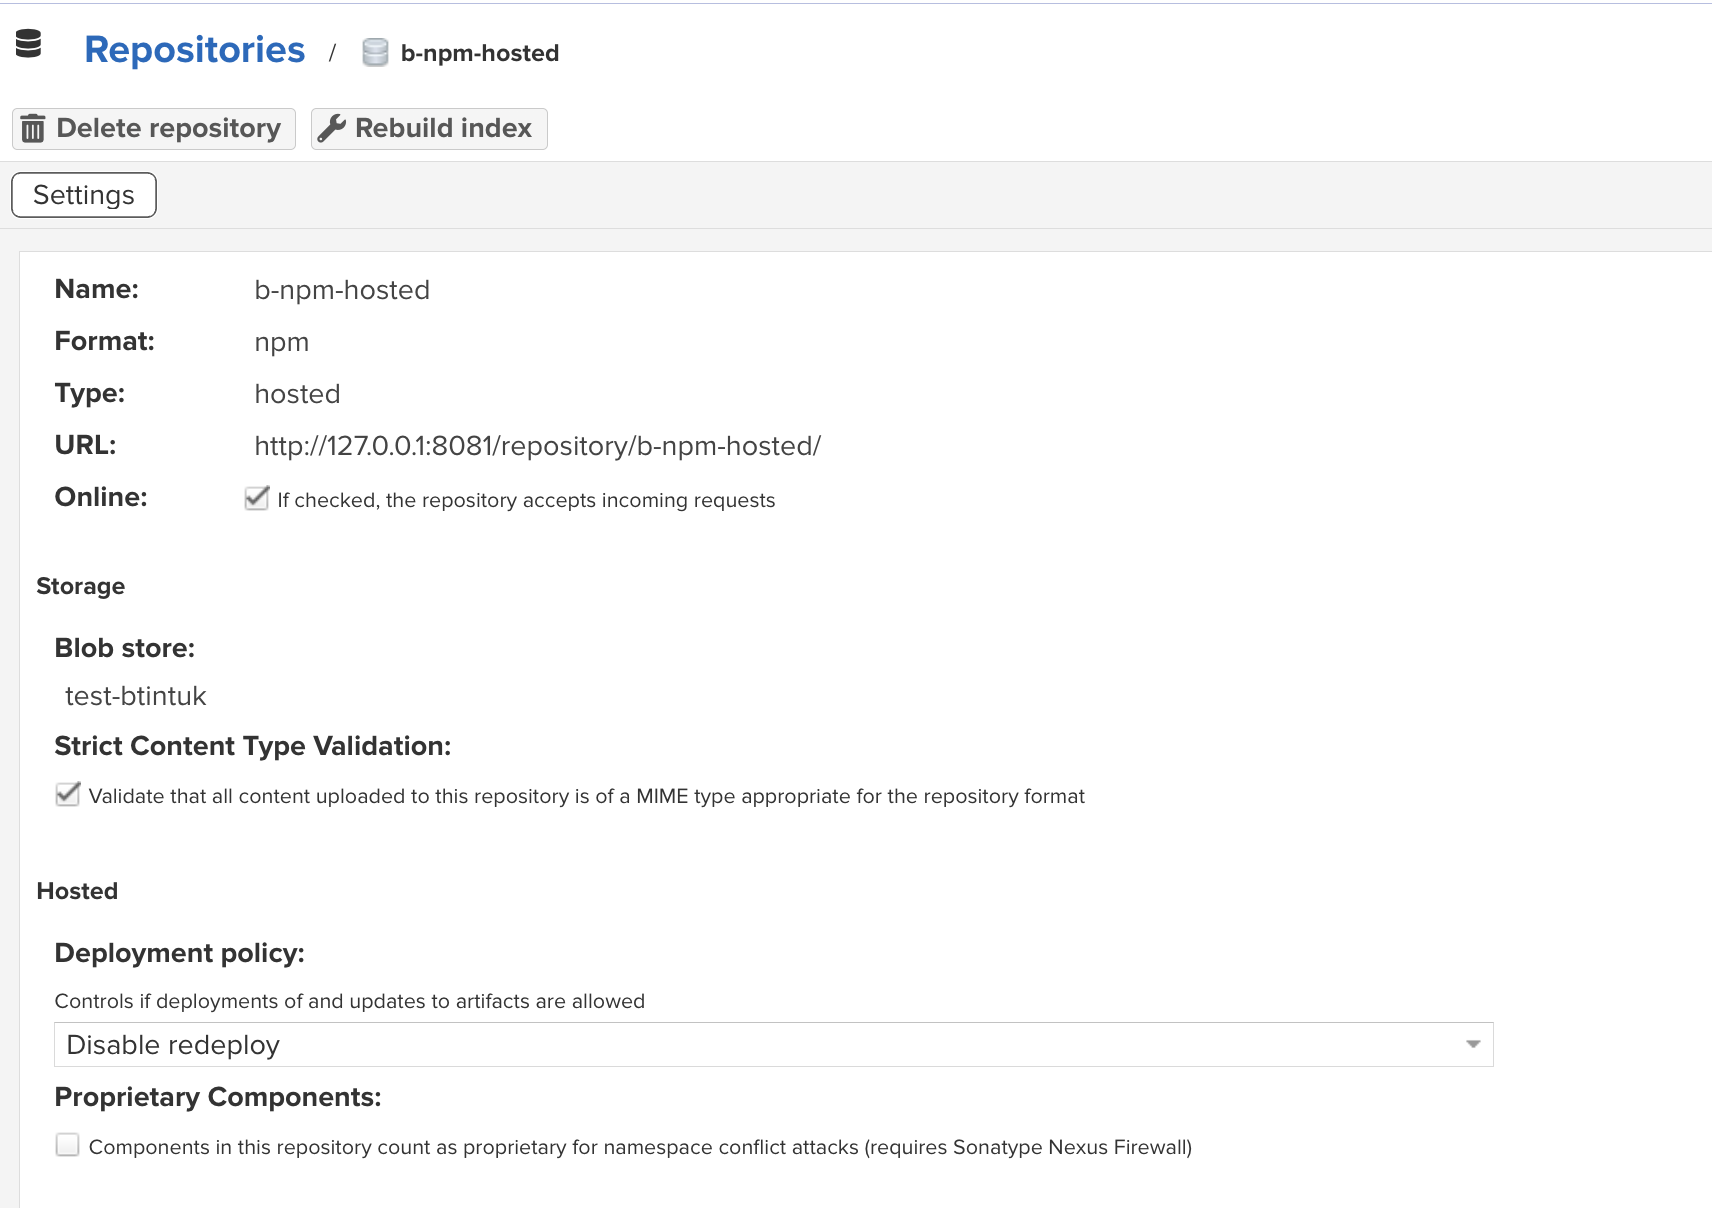
- Select the recipe
- Open the Nexus website, navigate to
Step 2: Create a Group Repository
- Open the Nexus website, navigate to
Admin>Settings>Repository>Repositories>Create Repository.- Select the recipe
npm (group)and clickNext. - Enter the name of the repository, for example
b-npm-group. - Add the previously created proxy
b-npm-proxyand hosted repositoriesb-npm-hostedto the group.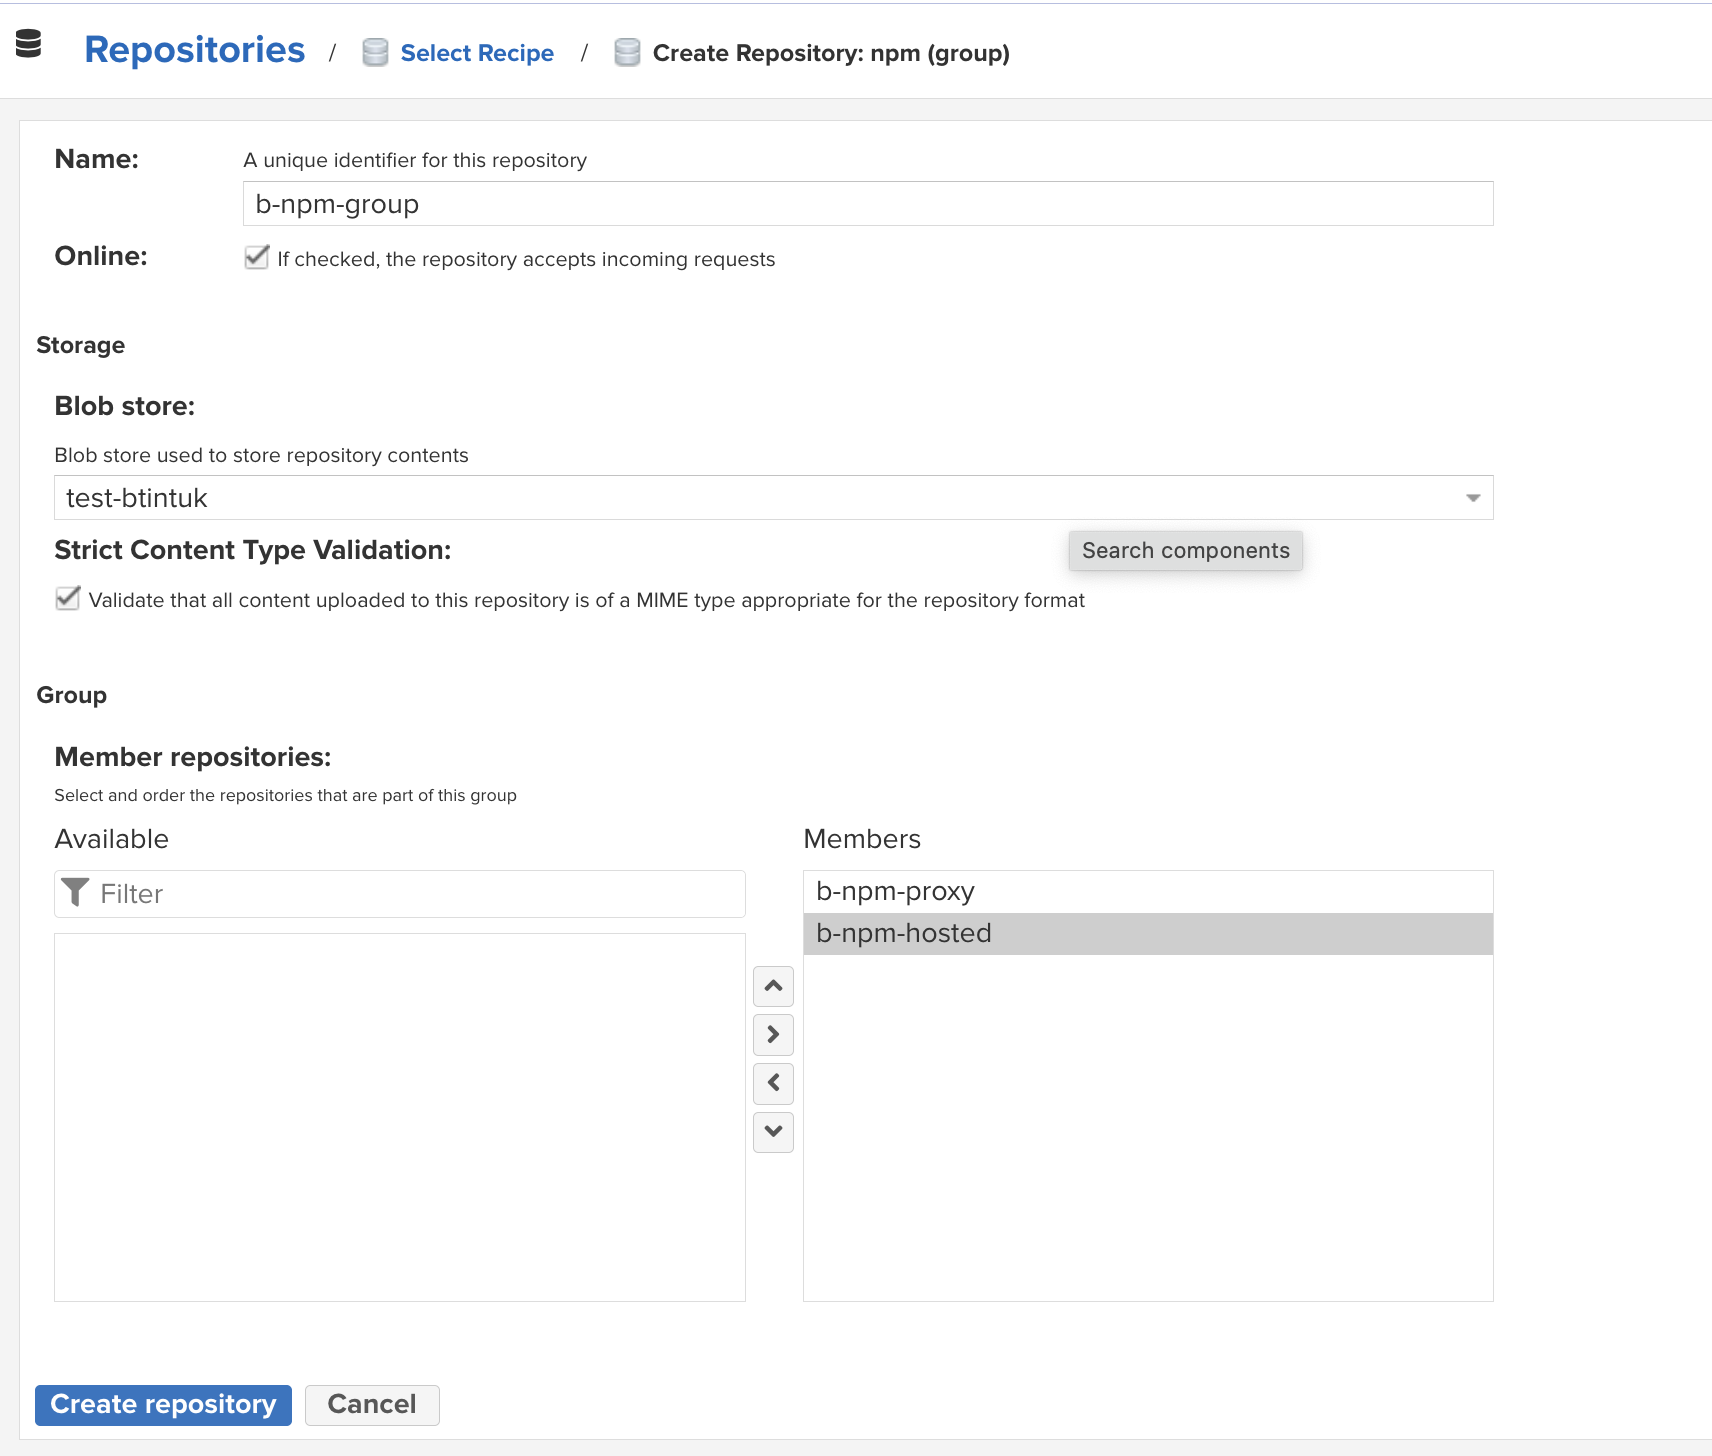
- Select the recipe
Step 3: Enable Bearer Token Authentication
- Open the Nexus website, navigate to
Admin>Settings>Security>Realms.- Enable the
Bearer Token Realmand move it to the top of the list.
- Nexus needs to validate and process this token. This only works if the Bearer Token Realm is active. Without this, you will get:
npm ERR! code E401
npm ERR! Unable to authenticate, need: BASIC realm="Sonatype Nexus Repository Manager"
- Enable the
Step 4: Configure NPM Client
-
Configure your
npmclient to use the Nexus NPM Group Repository by adding the following to your.npmrcfile:# Arguments for Nexus NPM registry
export NPM_USER="admin"
export NPM_PASS="your_password"
export NEXUS_HOST="nexus.tool.btin.info"
export NPM_REPO="b-npm-group"
# Configure npm to use Nexus with basic auth
npm config set registry https://${NEXUS_HOST}/repository/${NPM_REPO}/
npm config set always-auth true
npm config set //${NEXUS_HOST}/repository/${NPM_REPO}/:_auth="$(echo -n ${NPM_USER}:${NPM_PASS} | base64)"
Reference
- Official Nexus Documentation
- PostgreSQL Configuration Guide
- AWS S3 Best Practices
- Docker Compose Reference
- Updating - adding Encryption Key in Nexus Repository
- Step-by-Step Guide: Publishing private NPM packages to Nexus
Appendix
How to package and upload to NPM hosted repository
export NEXUS_URL="nexus.tool.btin.info"
export NEXUS_NPM_REPO="b-npm-hosted"

npm package
npm login --registry=https://${NEXUS_URL}/repository/${NEXUS_NPM_REPO}/ --always-auth --userconfig=./.npmrc
npm publish --registry=https://${NEXUS_URL}/repository/${NEXUS_NPM_REPO}/ --userconfig=./.npmrc